
Power Steering Reservoir & Fluid Change - 1 / 3 / 5 / X / Z

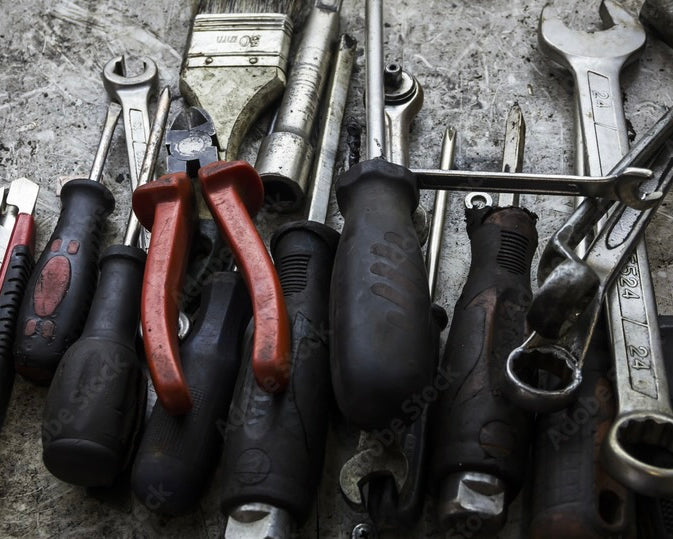
Materials Required
- Flathead Screwdriver
- Wire Cutters
- Band Clamp Remover
- Ratchet
- 10MM Socket
Overview
The power steering reservoir stores hydraulic fluid that keeps your BMW’s steering smooth and responsive. Over time, the reservoir filter can clog and the fluid can break down, leading to heavy steering, pump noise, or leaks around the engine bay. Replacing the reservoir and flushing the fluid ensures proper steering performance and extends the life of your system.
NOTE
There are two common ways to drain the power steering system on a BMW:
1. Bottom Method: Loosen the power steering drain bolt from underneath the car. This requires lifting the vehicle with a jack.
2. Top Method (Recommended): Remove the reservoir and drain the fluid using a transfer pump. This method is simpler, safer, and more practical for the average DIYer since it doesn’t require jacking up the car.
Start w/ Cold Engine
Ensure you conduct this DIY on a vehicle with a cold engine.

Open Hood
Open your vehicle's hood by pulling the latch.
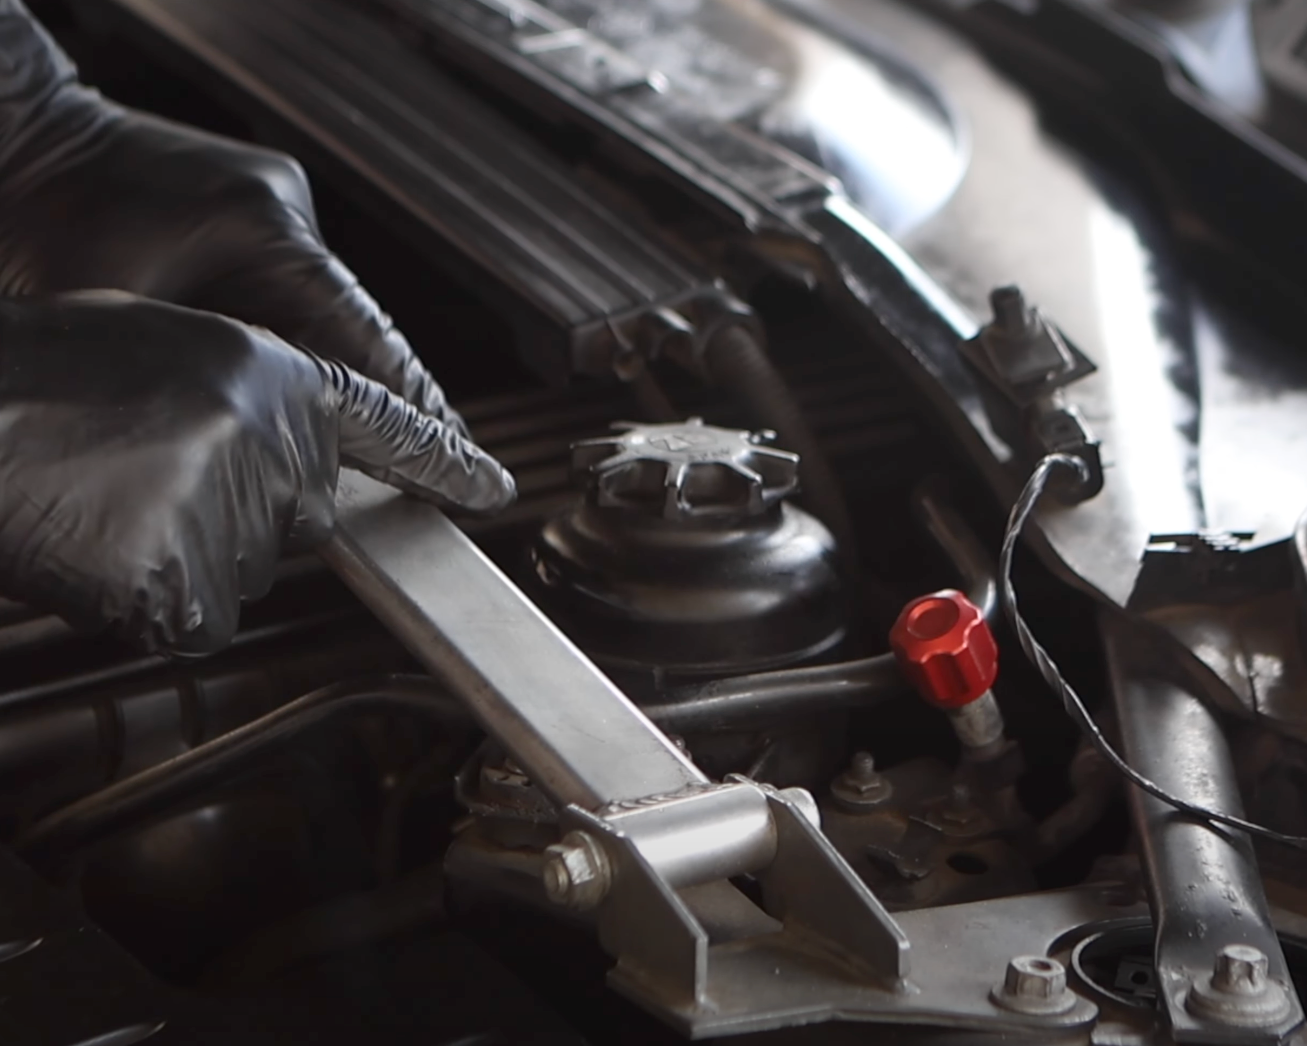
Loosen Reservoir Cap
To service the power steering system, the power steering system must

Place Microfiber Towel Under Hoses
To prevent spills and protect nearby electrical components, place a microfiber towel beneath the reservoir hose connections and around the transfer pump area. This will catch any fluid that may drip during removal and draining.

Insert Transer Pump and Remove fluid
Using a two-way transfer pump, place the inlet hose into the reservoir and the outlet hose into an empty drain pan. Slowly pump the fluid out of the reservoir until it is completely empty. For our recommended two-way transfer pump, [click here].

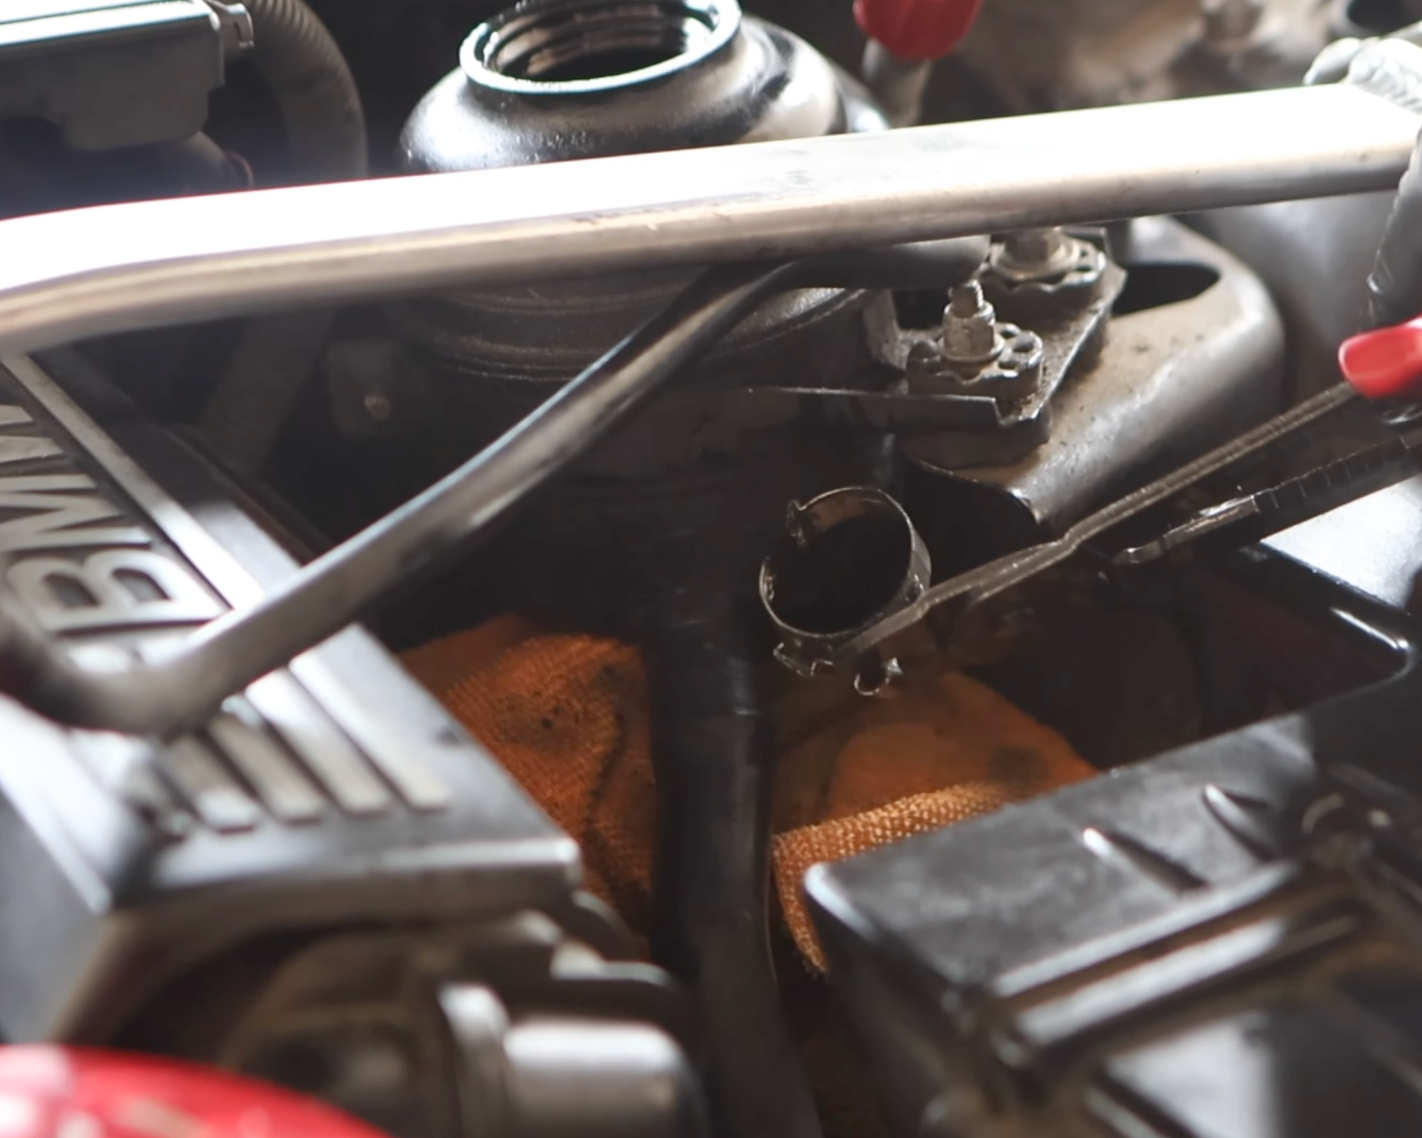
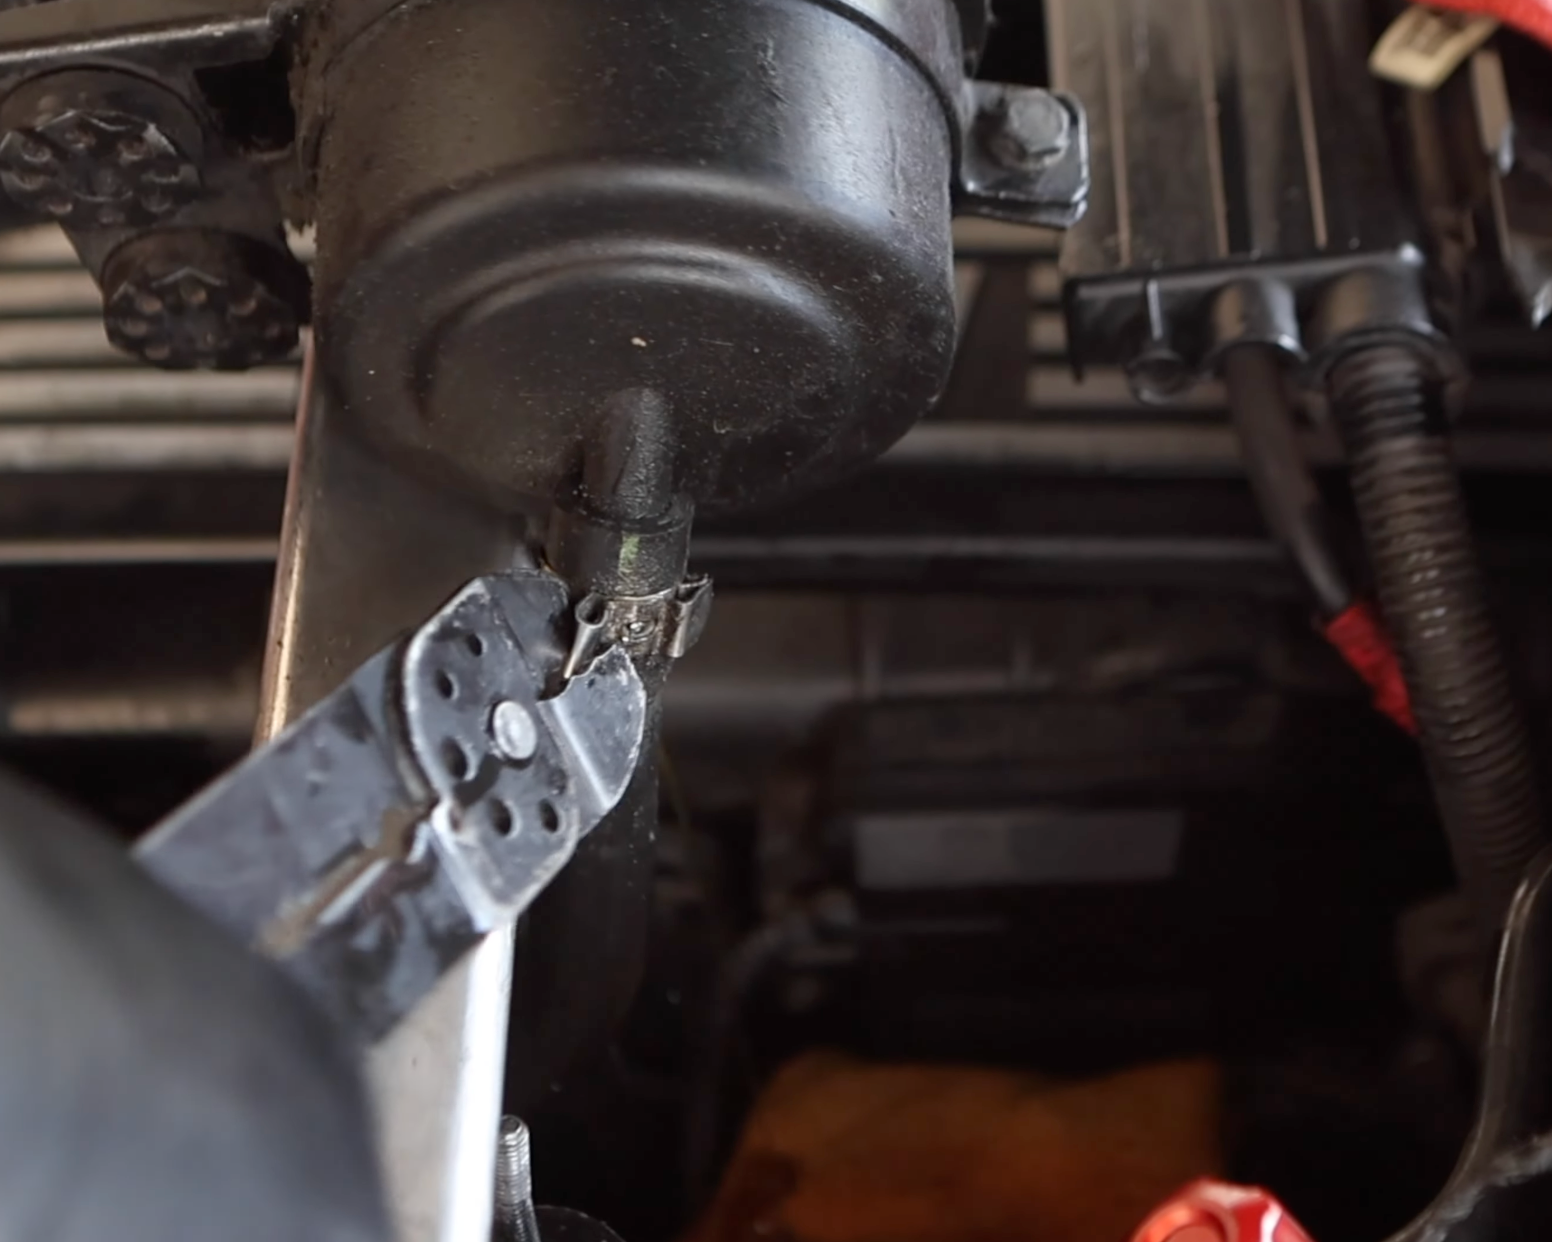
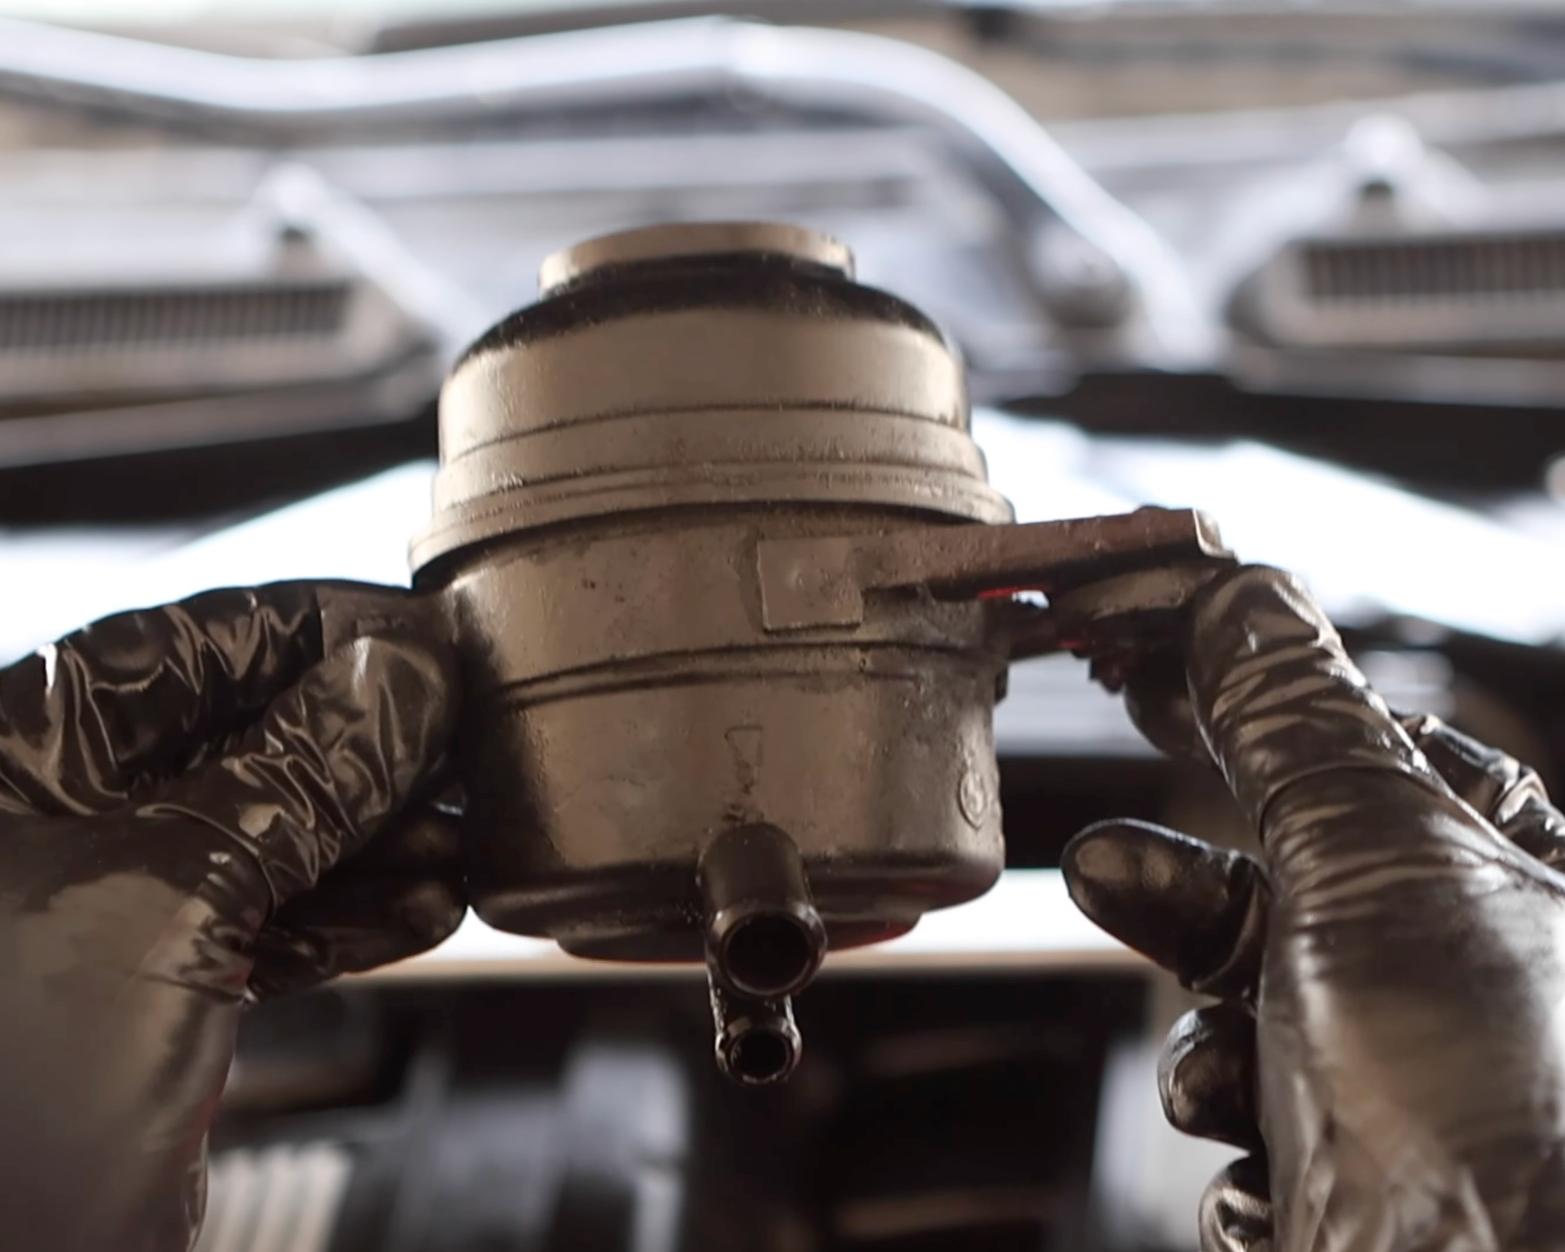
Locate Front Reservoir Clamp
The first clamp that needs to be removed is located at the front of the reservoir. Locate this clamp before proceeding with removal.
NOTE
The factory BMW band clamps cannot be removed with a screwdriver. They are designed as single-use clamps, meaning they must be crushed and cut off for removal — they cannot simply be unscrewed.

Crush Factory Clamp
Using a pair of wire cutters or metal pliers, apply diagonal pressure to the clamp to crush it.
Remove Factory Clamp
Once the clamp is crushed, it will release its grip on the hose, relieving the pressure and allowing for removal.

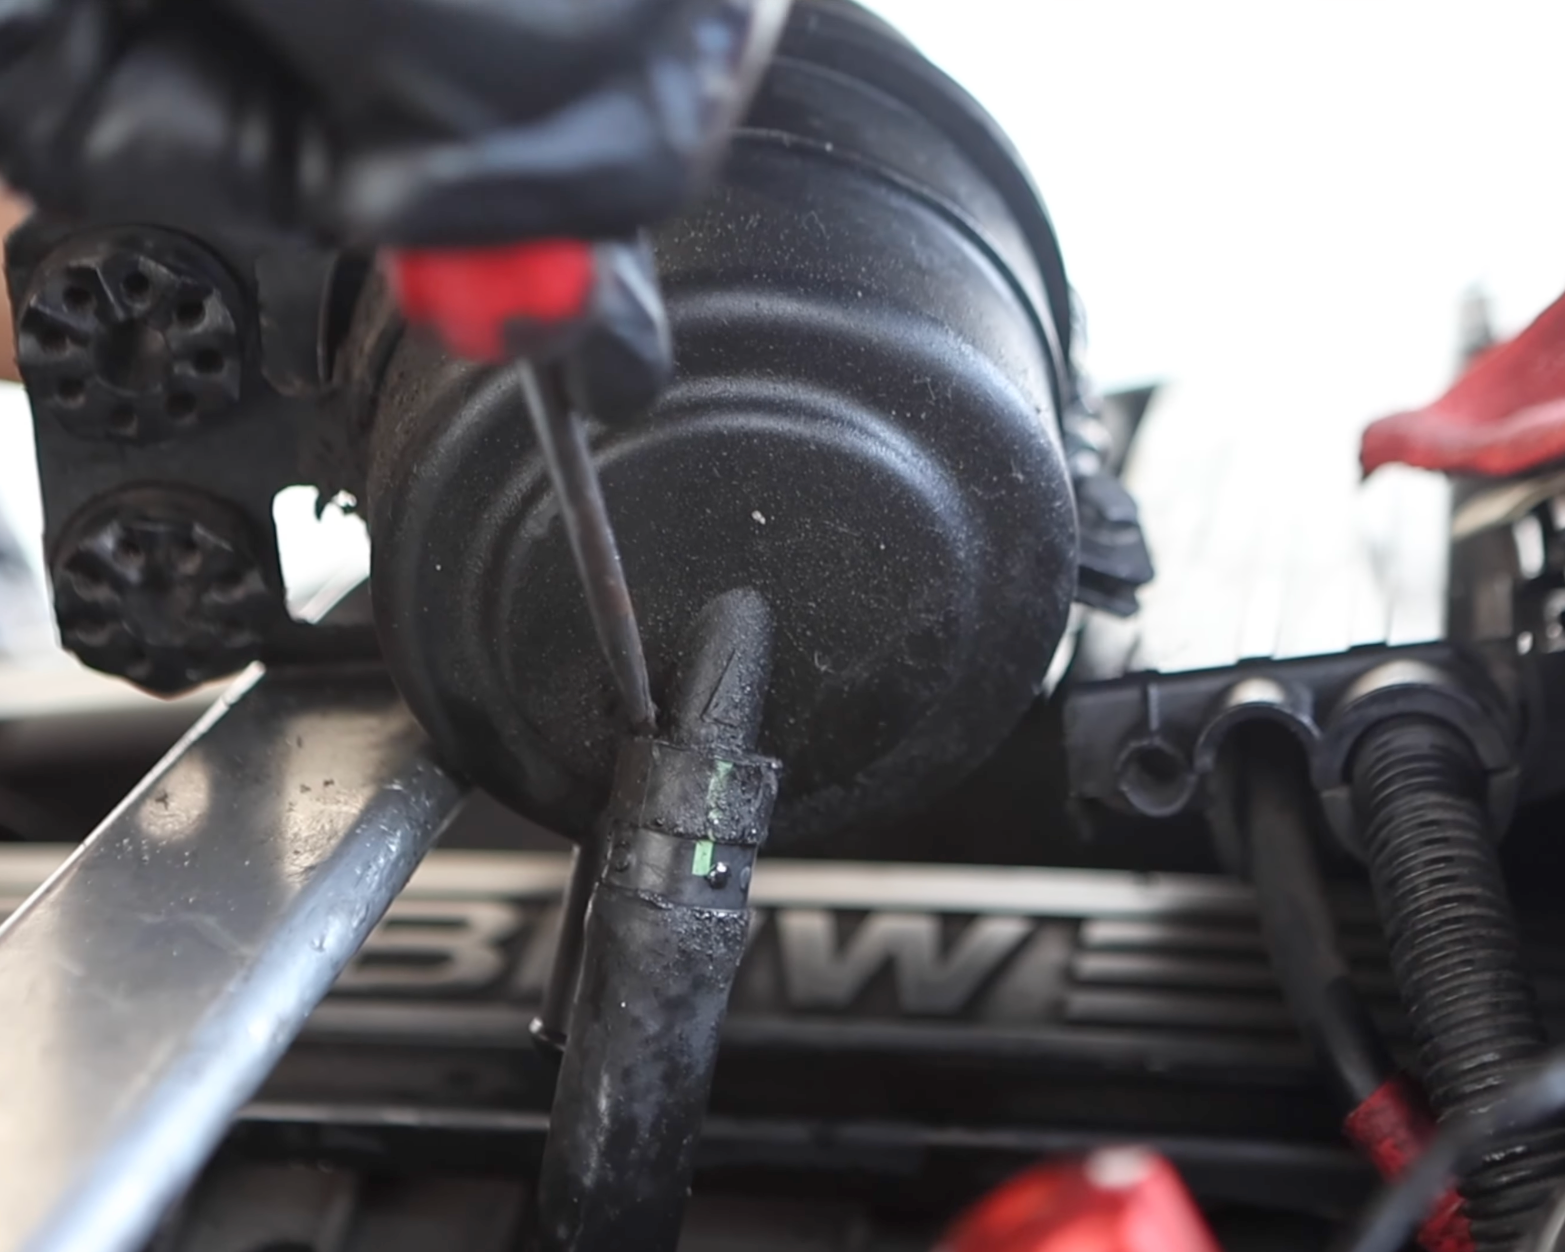
Remove Front Hose from Reservoir
Using a flathead screwdriver, gently pry the fluid hose away from the reservoir. Work the screwdriver in a circular motion around the mounting nipple to carefully break the seal. Do not pull directly on the hose, as this can cause tears or cracks that may require replacing the entire line.

NOTE
The hose will still be full of fluid, so take care not to tip it over and cause spills. A good resting point is between the air box assembly and the intake manifold, which will hold the hose upright and prevent fluid loss. You can also secure it with zip ties if needed. Keeping the hose elevated is important, as we’ll be flushing the system shortly.

Insert Transfer Pump Hose Into Reservoir Hose
Insert the inlet side of the transfer pump onto the power steering hose.
Pump Out Old FLuid
Begin pumping to draw fluid out of the hose — this will use suction to remove fluid from the pump and the rest of the power steering system. This is where the most degraded fluid typically settles. As you continue pumping, gradually push the transfer pump hose deeper into the line to extract as much old fluid as possible until no more can be drawn out.
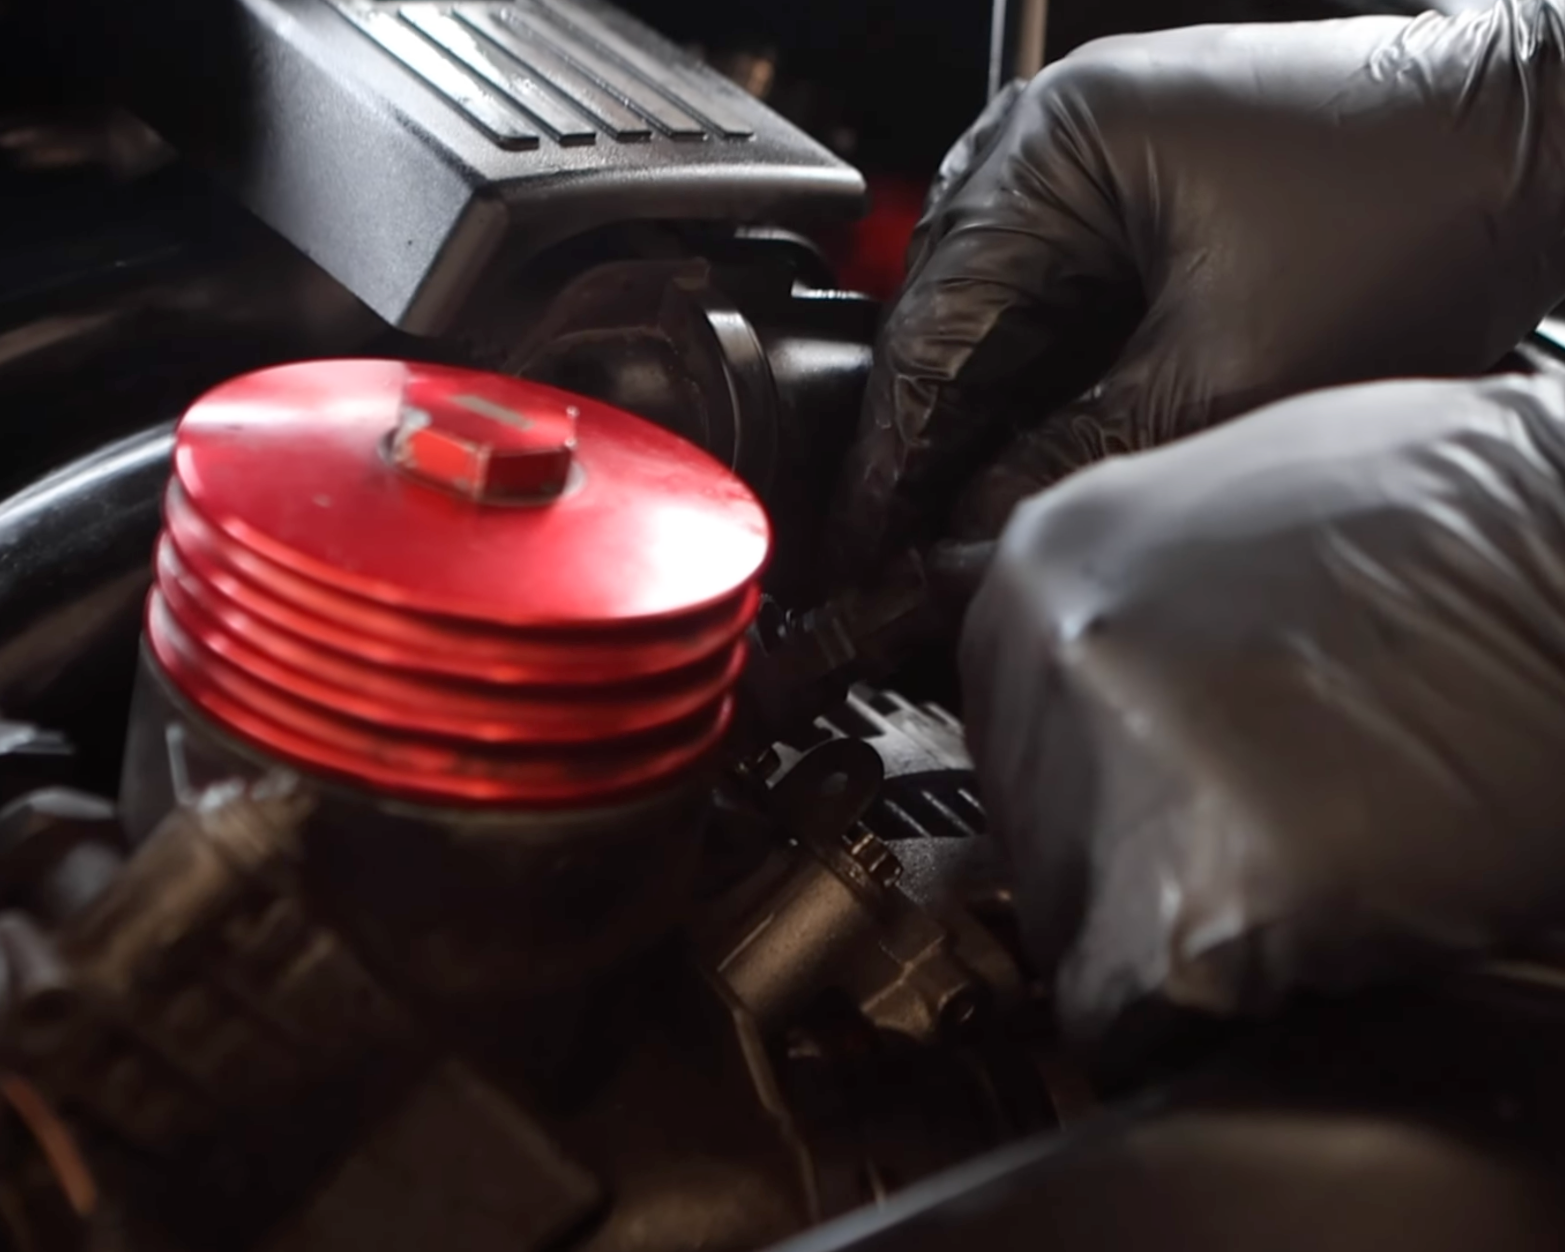
Detach Brake Booster Vacuum Line
The brake booster vacuum line runs over the top of the two mounting nuts for the brake reservoir, which need to be removed. To move the line out of the way, detach it from the vacuum pump.
Simply press inward on the two textured retention tabs, then squeeze and pull outward to release the line.

Loosen Power Steering Reservoir Nuts
Using a 10mm socket or wrench, loosen and remove the two 10mm nuts securing the power steering reservoir to the vehicle’s body.
NOTE
After loosening the front hose and flushing the fluid, the next step is to remove the reservoir to access the rear clamp. The rear hose is more difficult to reach, so you’ll need to loosen the reservoir mounting nuts and carefully lift the reservoir in your hand. This will give you enough room to maneuver it and remove the rear clamp securely.
Crush Rear Hose Clamp
Using a pair of metal pliers or wire cutters, crush the metal band clamp securing the rear hose. These clamps are single-use, so the goal is to break and remove it completely.
Remove Hose From Reservoir
Using a flathead screwdriver, carefully work the rear hose off the reservoir. The rear hose is secured to a concave nipple, making it more difficult to remove. Take your time and avoid pulling the hose by force, as this can tear the rubber and cause damage.
Reservoir Removed
With both hoses disconnected and the two 10mm nuts removed, the reservoir can now be lifted out of the engine bay and replaced with the new unit.
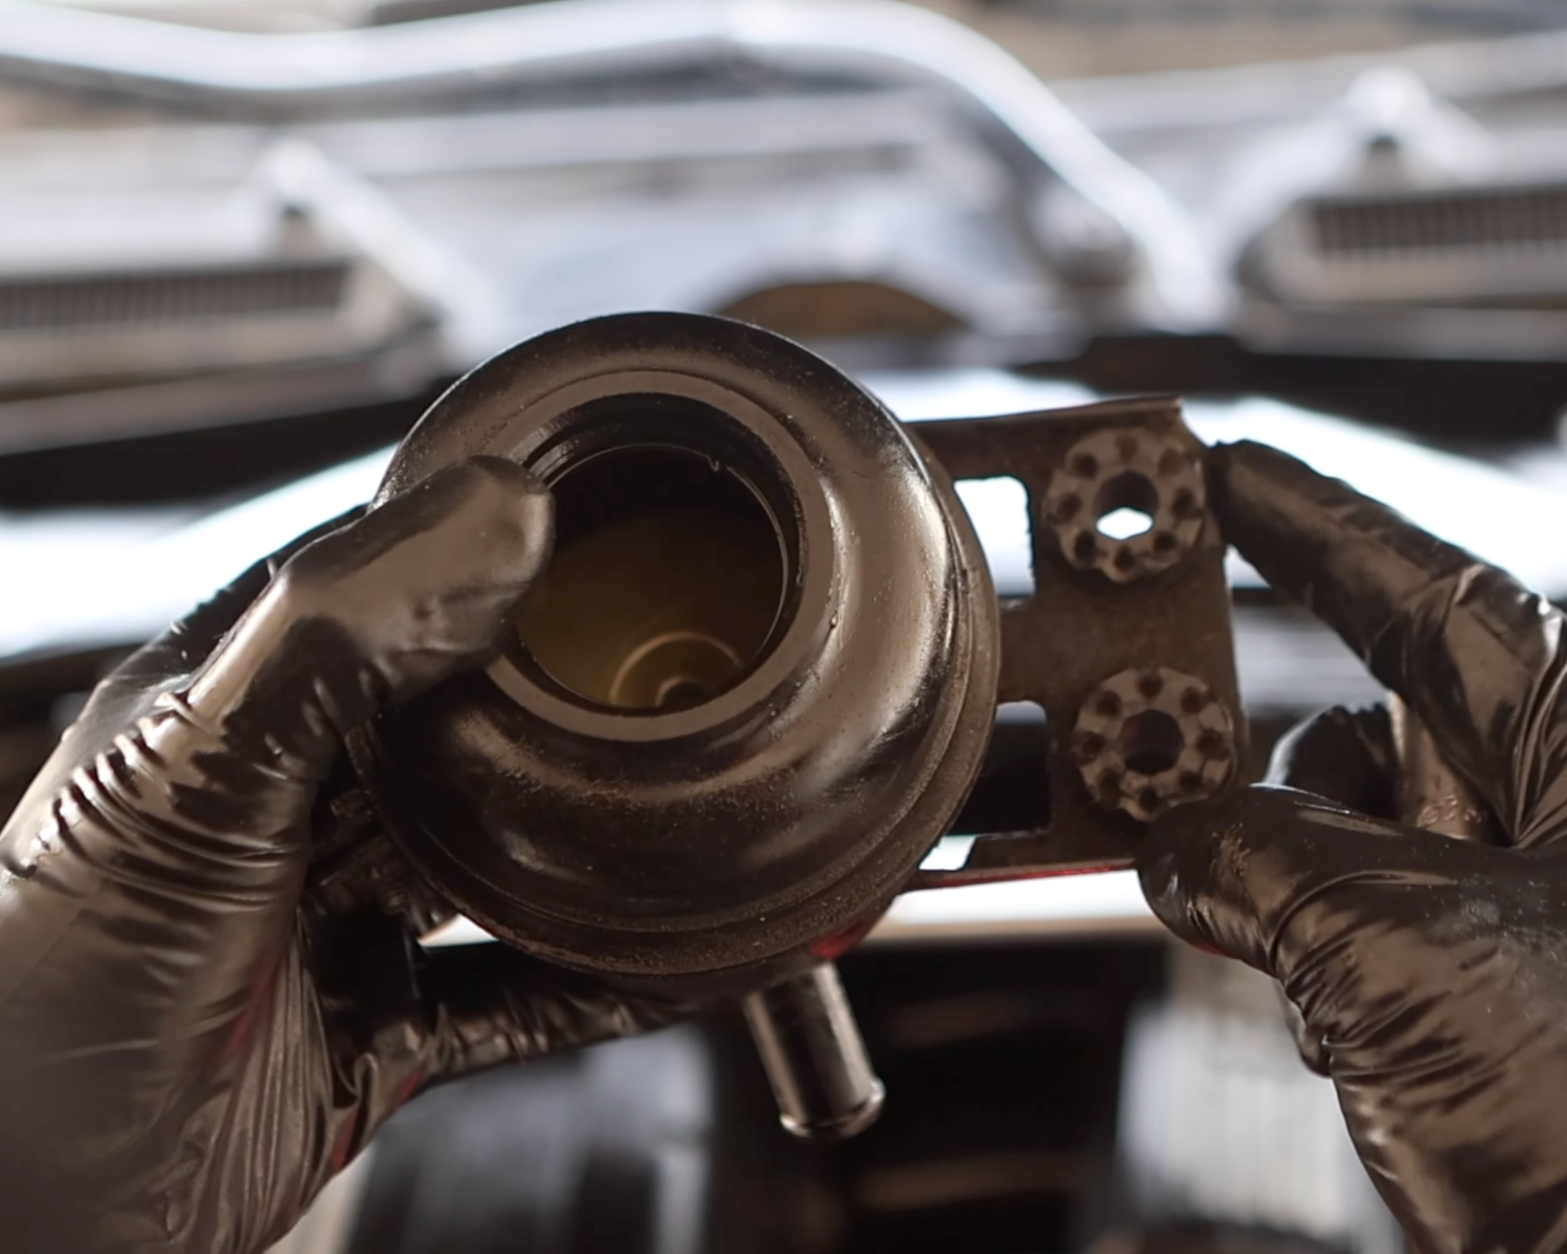
NOTE
The old reservoir has a mounting bracket attached that secures it to the chassis. This bracket will need to be transferred to the new reservoir before installation. Mark the exact position of the bracket on the old reservoir using a Sharpie or similar tool. When transferring it to the new reservoir, the bracket must line up perfectly; otherwise, the hoses may be pulled or strained once everything is tightened.

Loosen Mounting Bracket
Using a 10mm socket with a ratchet, loosen the locking nut that secures the bracket to the old reservoir.
Bracket Removed
Inspect New Reservoir
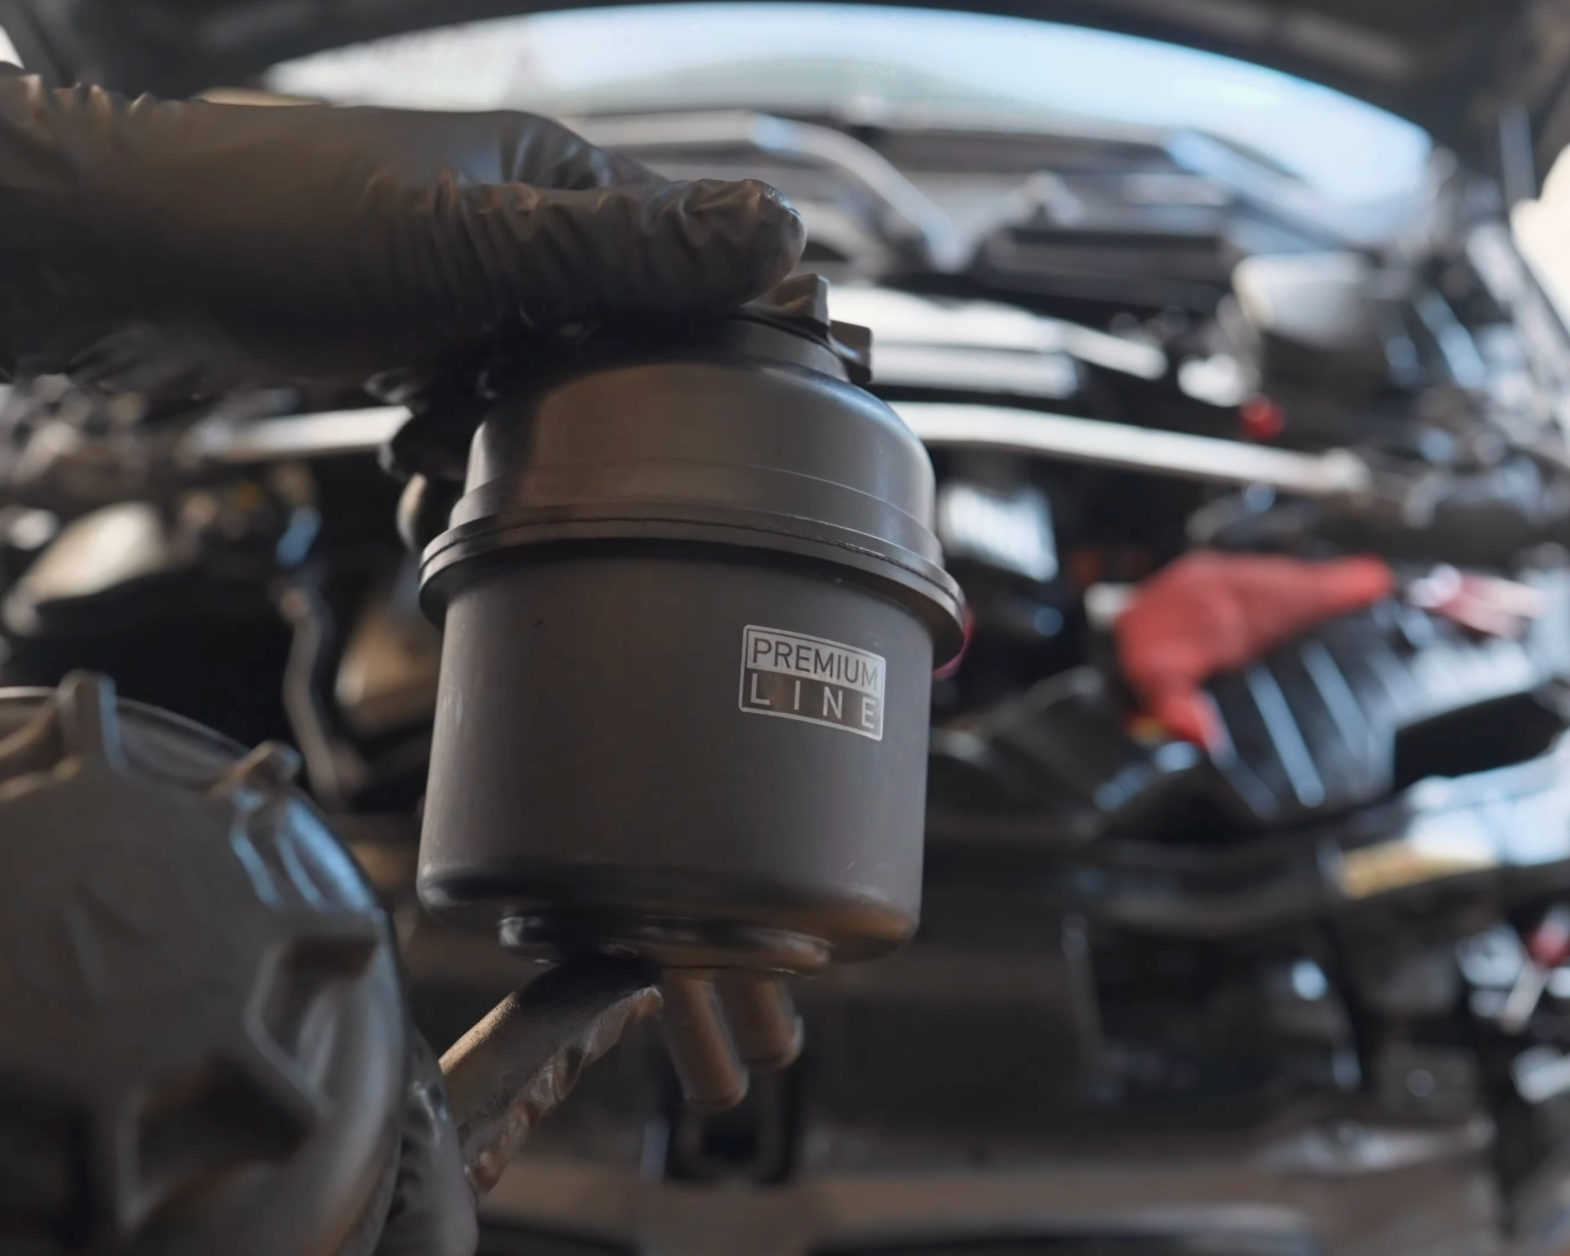
Before installing the new reservoir, give it a quick inspection. Make sure the hose nipples are in good condition with no damage, the internal filter at the bottom is intact, and the cap tightens firmly. Once everything checks out, it’s time to install the new reservoir.
Our Premium Line BAVMODS® Replacement Reservoir is a complete solution designed to restore proper steering performance and resolve common reservoir-related issues.
•BMW E90 Upgraded Metal Unit w/ Active Steering – Designed for BMWs equipped with Active Steering for improved durability.
•BMW E90 Direct-Fit Replacement w/ Active Steering – Compatible with E90 models featuring Active Steering.

Transfer Bracket To New Reservoir
Transfer the mounting bracket onto the new reservoir. Important: The bracket must be positioned exactly as it was on the old reservoir. If it’s misaligned, the reservoir will place unnecessary stress on the hoses once reinstalled. Be sure to line it up in the same orientation as when it was removed.

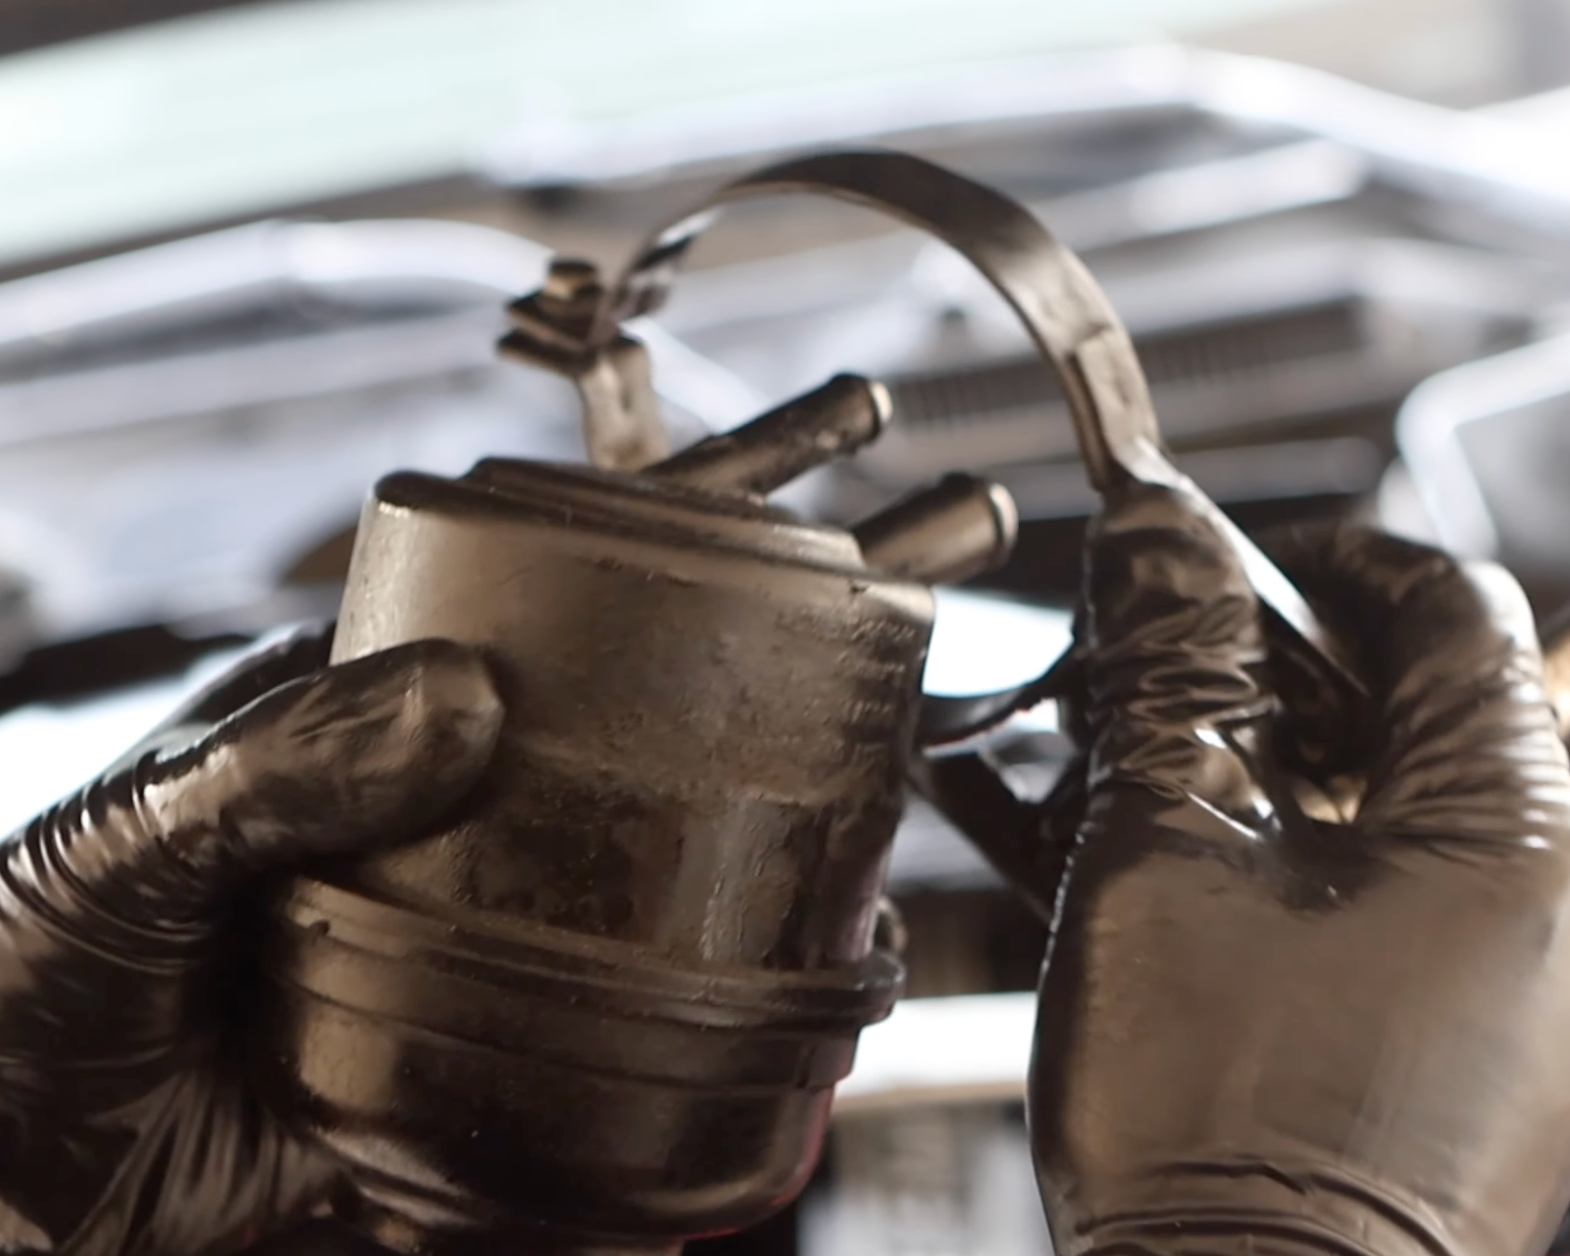
Reinstall Hoses with New Clamps
It’s now time to reinstall the power steering hoses onto the new reservoir. Since the factory BMW band clamps are single-use, we’ll be replacing them with standard band clamps from any local auto parts store. This makes future removal and reinstallation of the reservoir much easier.

Slip On Band Clamps To Hoses
Before reinstalling the hoses, slide the new band clamps over each hose so they are preloaded and ready to be tightened once the hoses are in place.

Reconnect Hoses (Rear First)
With the reservoir still unmounted and in your hand, reattach the two power steering hoses — starting with the rear hose first, followed by the front hose. The rear hose must be connected first, as it will be harder to access once the front hose is installed.

Tighten Band Clamps
Tighten the band clamps using a screwdriver. Make sure the clamp heads are oriented so they don’t overlap and are angled toward you for easy access. This ensures the clamps can be serviced in the future without interfering with one another.

Re-Install Reservoir Locking Nuts
With both hoses securely tightened to the reservoir, carefully orient and position the new reservoir in place without pulling on the hoses. Reinstall the two 10mm nuts and hardware, tightening them until the reservoir is firmly secured to the chassis.

Re-fill Reservoir with FLuid
With the reservoir fully tightened to the vehicle and both hoses secured, refill the power steering system with the recommended fluid (CHF-11S for most BMW N52 models).

NOTE
The type of fluid your BMW requires will depend on the year, model, and specific steering system:
•Black Cap – “ATF Fluid Only” → Requires ATF fluid.
•Black Cap with Green Sticker → Requires CHF-11S synthetic fluid.
Important: BMW used the same black cap on both systems, simply applying a green sticker on top for CHF-11S cars. Over time, these stickers can peel off, making it appear as though your vehicle requires ATF when it actually does not. To be certain, always reference your exact VIN before purchasing or filling fluid.
Reattach Brake Booster Vacuum Line
Reattach the brake booster vacuum line to the brake booster vacuum pump. Ensure it is pressed firmly until it snaps securely into place.
Warning: Failure to properly reattach this line will result in a loss of brake pressure, which can cause serious vehicle damage and compromise safety.
Test Start Vehicle
Start the vehicle and keep it in Park. With the engine running, slowly turn the steering wheel back and forth from lock to lock several times.
This process will circulate the fluid throughout the power steering system, allow it to drain into all necessary components, and help remove any trapped air.

Recheck and Top Up Fluid
After test-starting the vehicle and circulating the fluid, the fluid level may drop as it flows through the system. Recheck the reservoir and add more fluid as needed until the level is even and within the recommended range.

Reinstall Reservoir Cap
Reinstall the reservoir cap and tighten it securely. If you’d like to color-coordinate your engine bay, consider upgrading to our metal reservoir cap, which comes pre-installed with a complementary seal and O-ring for a precise fit.
Repair Complete
Great job replacing your power steering reservoir and flushing out the old, corroded brake fluid — all completed from the top of the engine without a jack and using only simple hand tools.
Before resuming normal driving, take your vehicle for a short test drive in a safe, low-traffic area. This will help ensure everything is functioning properly and confirm there are no leaks that could cause damage or compromise safety.