
Eccentric Shaft Sensor Gasket Replacement Guide


Materials Required
- Extension
- Ratchet
- 10MM Socket
- 6MM Allen Key
- 8MM Socket / Wrench
- E14 Socket
- Flathead Screwdriver
- Pick Tool
- Microfiber Towel
- Replacement Eccentric Shaft Sensor Gasket

Overview
The eccentric shaft sensor is an extremely vital component in engine operation, providing key timing data from the eccentric shaft to aid in the combustion process. Over time, the seal around it can deteriorate, leading to oil and vacuum leaks. In more severe cases, oil contamination can damage the sensor itself, resulting in costly repairs. Today, we’ll be replacing this gasket as a preventative measure to avoid these issues.
Start w/ Cold Engine
Ensure you conduct this DIY on a vehicle with a cold engine.
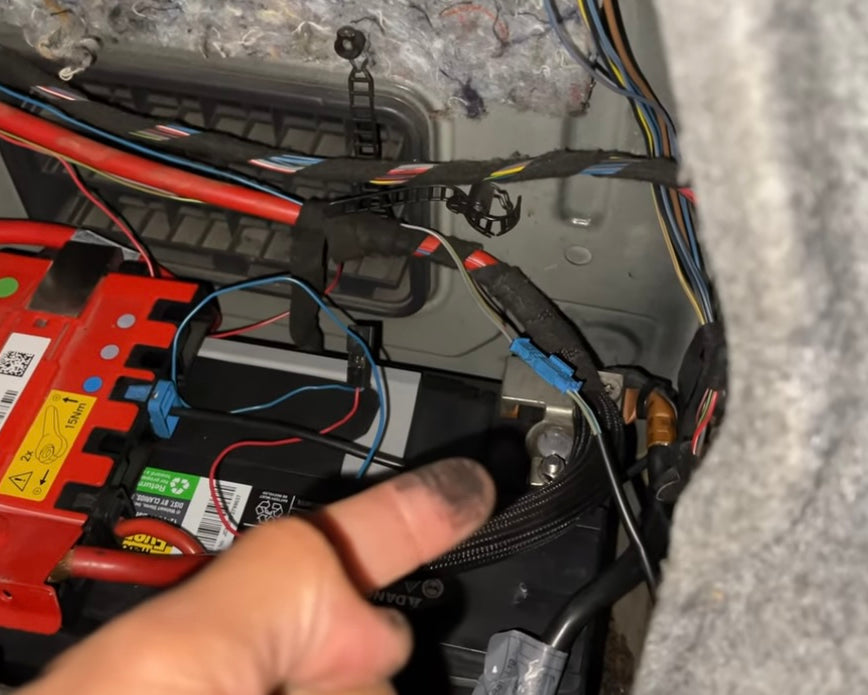
Disconnect Battery
Disconnect the vehicle's battery to ensure safety while conducting this job.

Open Hood
Open your vehicle's hood by pulling the latch.
Remove Cabin Air Filter Cowl
Remove the cabin air filter, HVAC cowl and all covers in the way of accessing the ECU. You should only need an 8MM socket for this.
Unlatch Engine Wiring Harness
Unlatch the engine wiring harness by firmly pulling the three latches free of the HVAC cowling.
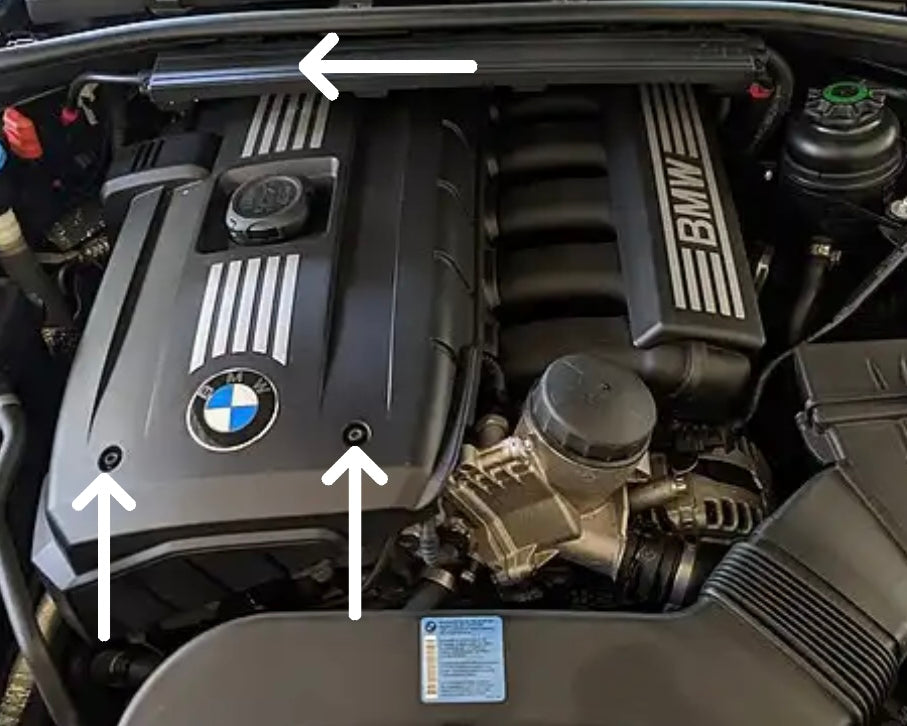
Remove Engine Cover Screws
Remove the three screws that secure the engine cover.

Release Rubber Seal
Release the rubber seal retention grommet from the ECU and brake fluid reservoir cowl cover.

Remove ECU Cowl Cover
Remove the ECU cowl cover by gently prying the two retention clips on the side free until the cover can be removed from the engine bay.
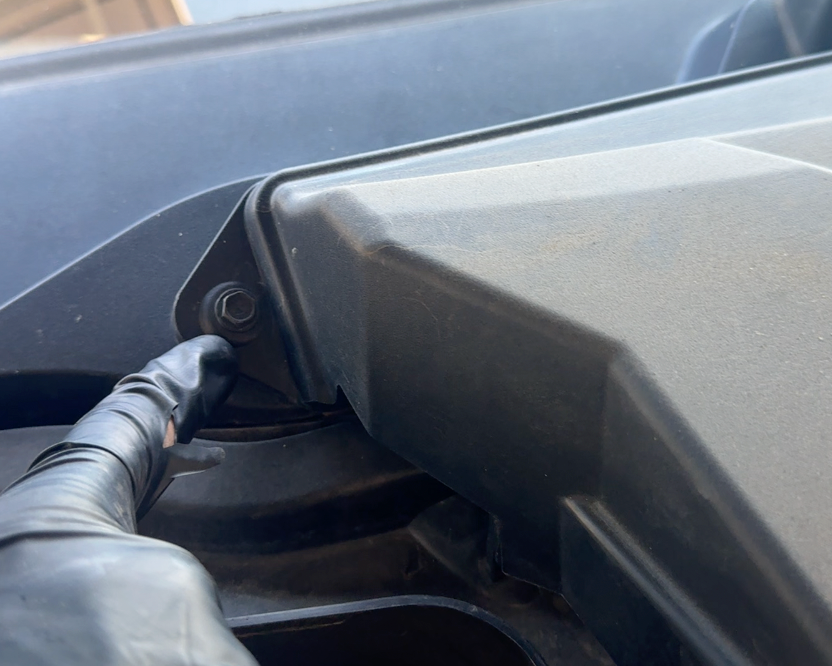
Remove 8MM Cowl Screw
Remove the 8MM cowl screw located underneath the cover.
Remove Brake Fluid Reservoir Cowl Cover
Remove the brake fluid reservoir cowl cover, the same way as the ECU one.

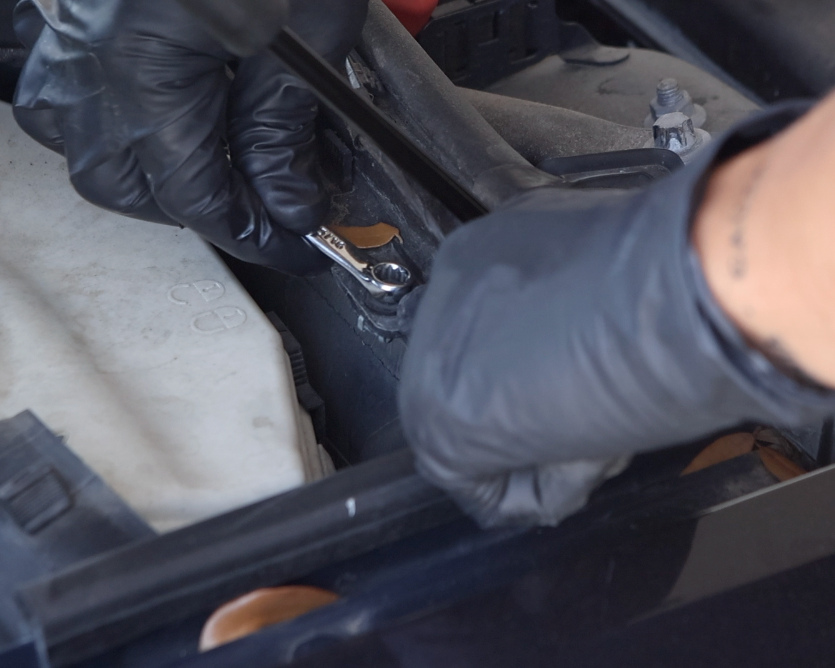
Remove 8MM Cowl Screw
Remove the 8MM cowl screw underneath the brake fluid cover using a socket / wrench.
Remove 4 Cabin Air Filter Screws
Remove the 4 8MM cabin air filter screws using a socket / wrench.

Remove Cabin Air Filter
With all 4 screws removed, carefully lift the cabin air filter out of place.
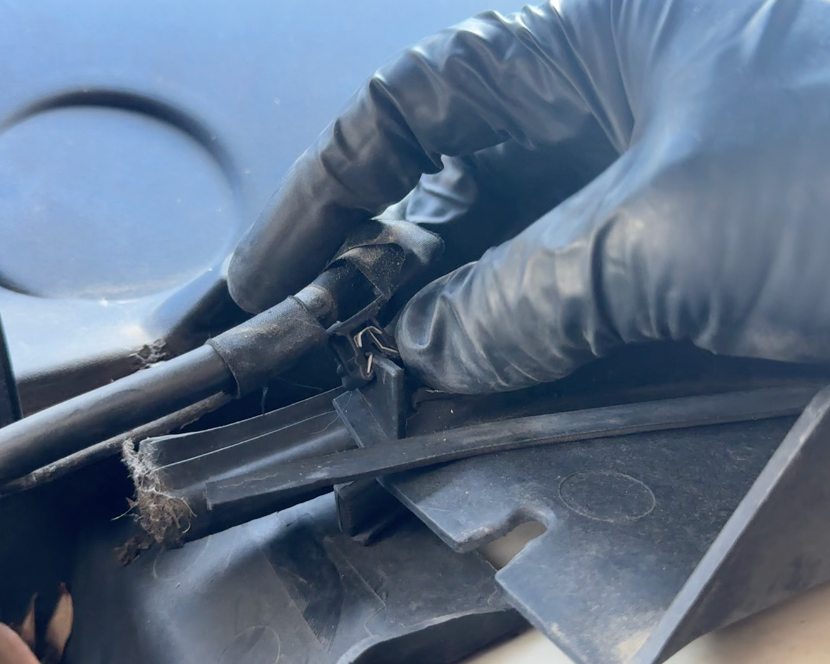
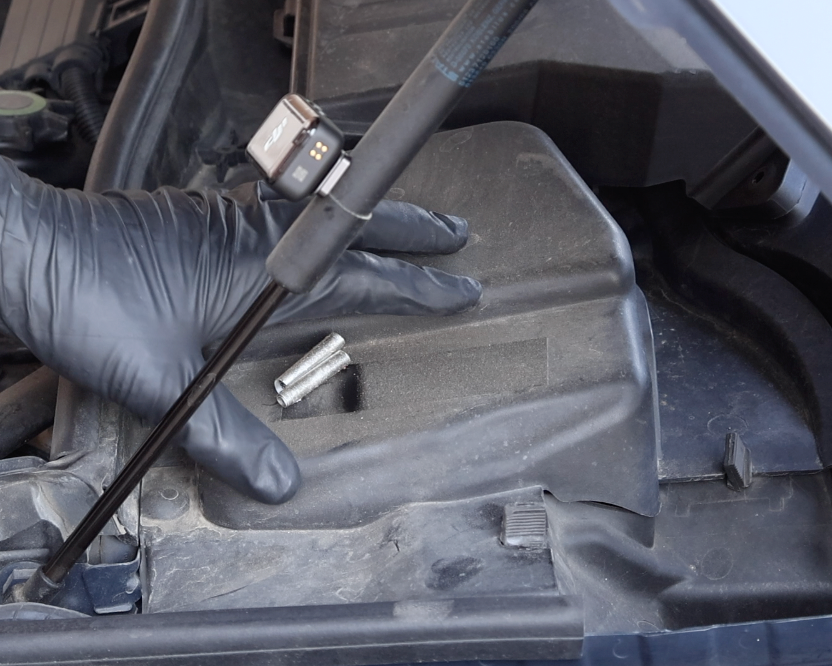
Unlatch Windshield Washer Line from Cowl
Unlatch the windshield washer line from the cowl by pulling the metal retention clip off of it's resting place.
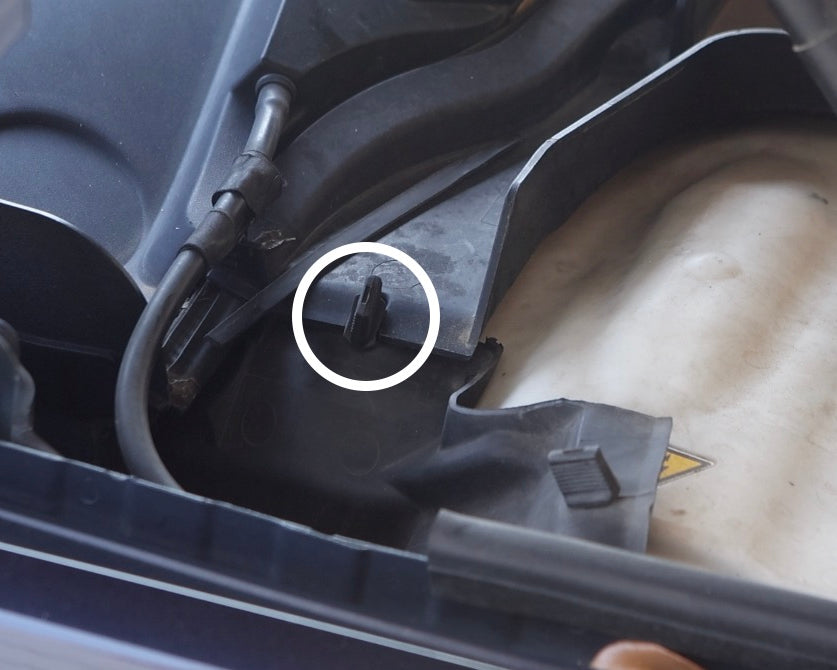
Release Rubber Grommet from Cowl
Release the rubber grommet (white circle) from both sides of the HVAC cowl by simply pulling it free.

Disconnect HVAC Connector(s)
Release the electrical connector fixed to the HVAC cowl by pressing in the retention clip and pulling it free. Depending on the year, make and model, your vehicle may have 2 of these connectors. 1 will be located as shown, the other closer to the brake fluid reservoir.

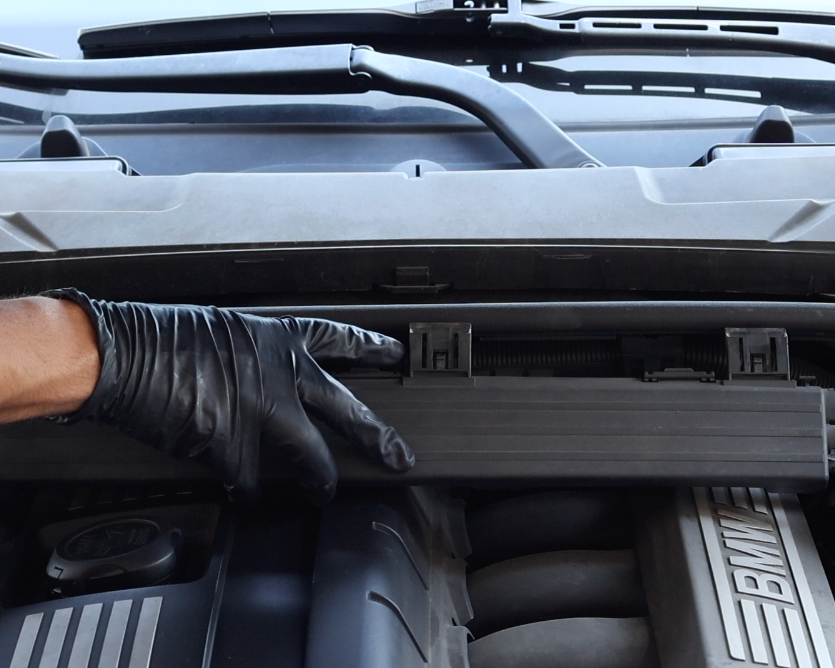
Unclip Engine Wiring Hose
Unclip the 3 sets of clips holding the engine wiring hose in place to the bottom side of the HVAC cowling.
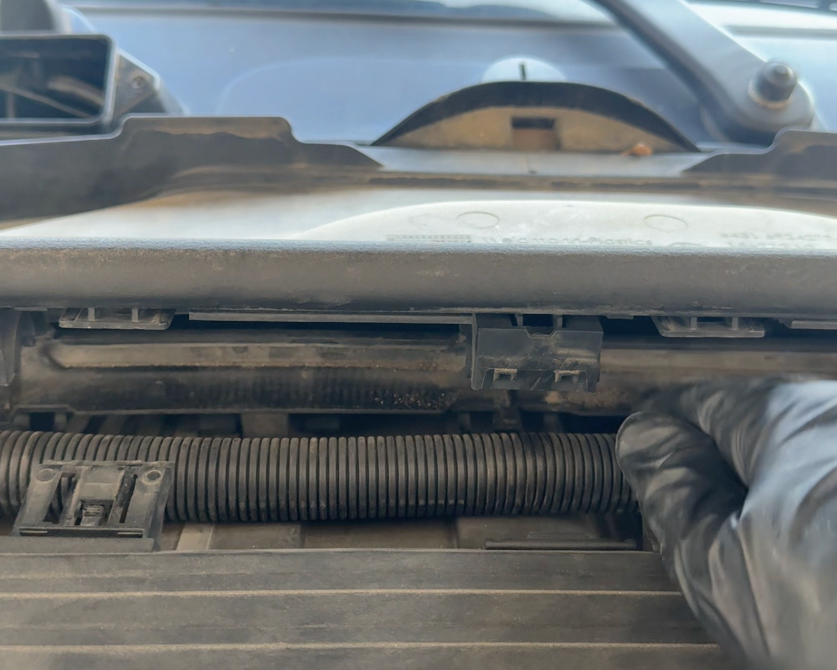
Remove Wiring Hose from Cowl
Pull the HVAC wiring hose free from the underside of the cowl.
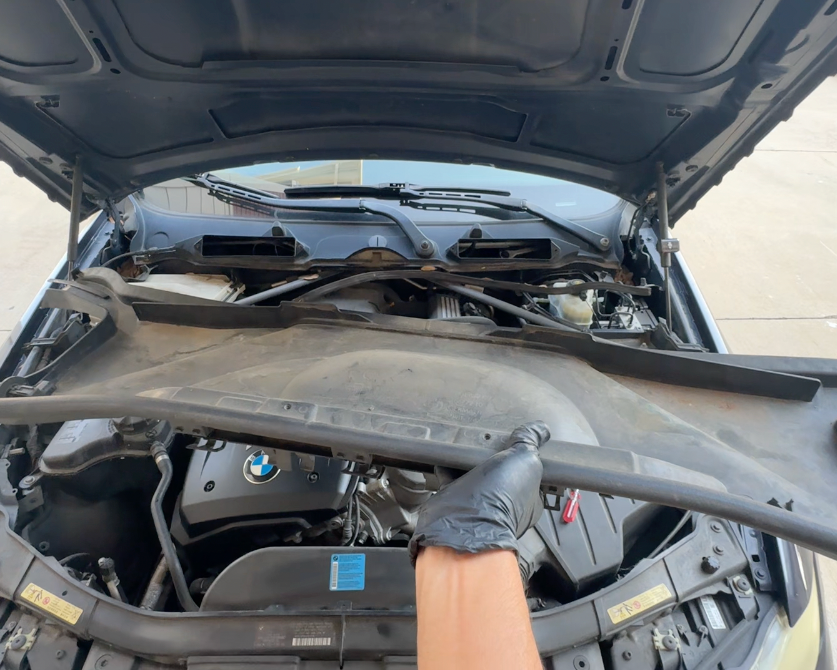
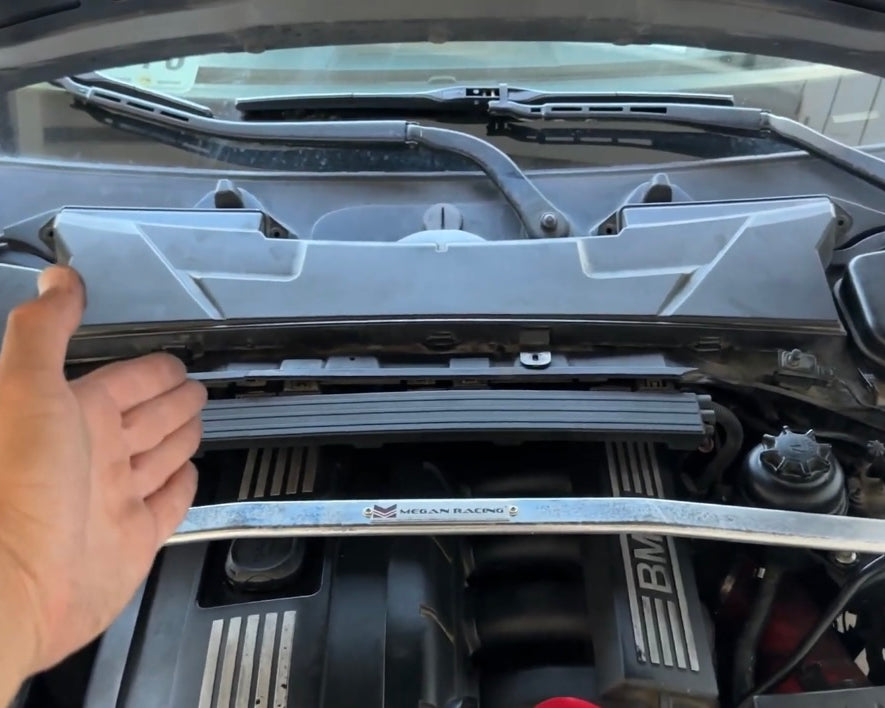
Remove Cowl
With all connecting points free and loosened, carefully remove the HVAC cowl ensuring you do not hit it into any of vehicle
Remove Front Engine Cover Screws
Remove the front 2 engine cover screws using a 5MM allen key. (The sizing for these screws may very depending on year, make or model.)

Remove Rear Engine Cover Screw
Remove the rear 1 engine cover screws using the same 5MM allen key.
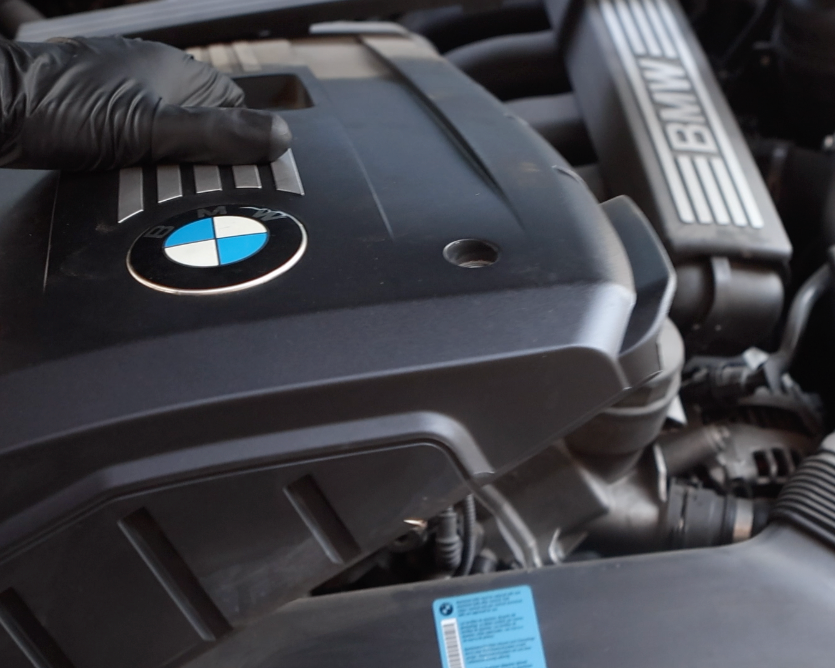
Remove Engine Cover
With all 3 screws removed, the engine cover can now be carefully lifted out of place.

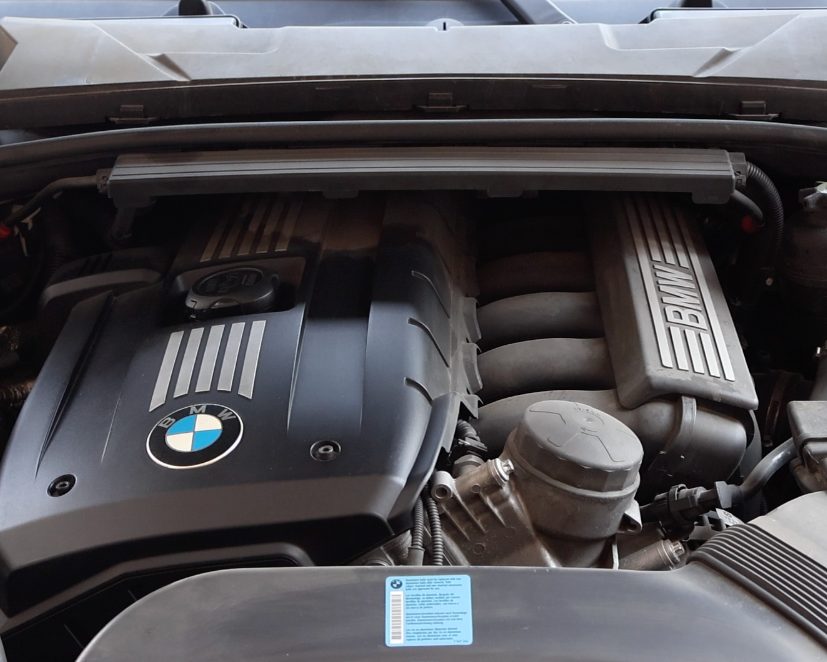
Locate Eccentric Shaft Sensor
The eccentric shaft sensor is located on the front of the valve cover and has a single electrical connector attached to it.

Oil Leak Located
As you can see underneath the sensor, there is excess oil pooled up and residue left behind. This is a common indicator that the gasket is leaking.

Unplug Electrical Connector
Unplug the sensor connector by pressing the release tab and firmly pulling it straight out.

Inspect Eccentric Shaft Plug
Inspect the eccentric shaft sensor plug for any signs of oil contamination. This is the leading cause of sensor failure and, if severe, may require removal of the valve cover and replacement of the entire sensor. If oil is present inside the plug, use a can of compressed air to gently blow out the residue, then carefully dry the plug with a soft towel. Take extra caution not to bend or apply pressure to the delicate metal pins.

Lift Up Gasket
Using a very thin flathead screwdriver, carefully lift up on the gasket. Since the gasket has a metal frame underneath, the best way to remove it is by prying at the small star-shaped notches, as shown in the photo. Avoid prying on other areas, as this can easily tear the gasket. Always lift from the star-shaped portions for safe removal.

Continue Lifting gasket
When removing the gasket, work in a circular pattern to lift it evenly and prevent bending or tearing.

Remove Gasket
After gently wiggling it back and forth, the old gasket is now fully removed.

NOTE
Visually inspect the old spark plug for any damage, corrosion and/or contamination. The condition of the spark plugs are telling of the overall condition of the engine.
White stains could indicate fuel issues.
Excessive black stains can indicated old age or the vehicle running rich.
Black sludge can indicate oil burning and/or leaks.
Rusted threads can indicate old age and/or water exposure from floods/rain, but in rare cases could point to coolant leaks in the head gasket.

Clean Mating Surface
Using a clean microfiber towel, wipe down the mating surface to remove any oil or debris. This ensures the new gasket seats properly and prevents future vacuum leaks.

Inspect New Gasket
Inspect the new eccentric shaft sensor gasket to confirm it matches the correct size and shape for your engine. For BMWs with the N51/N52 engine, be sure to check out our BAVMODS® premium replacement gasket for a reliable, long-lasting solution.

Install New Gasket
Install the new eccentric shaft sensor gasket by carefully slipping it over the connector tabs.

NOTE
Be extremely cautious not to snap the plastic tabs. Gently slide the gasket from left to right over the top of the tabs, ensuring it seats properly without applying downward pressure on the fragile connectors.

Press Down New Gasket
Using firm, even pressure, press around the entire circumference of the gasket until it is fully seated with no gaps and sits completely flush.

Reinstall Electrical Connector
Reinstall the electrical connector by aligning the tabs and pressing it firmly into place. Make sure it clicks in securely, with the electrical cables routed downward.

Reconnect Battery
Reconnect your BMW's battery.
Clear Engine Codes
With the electrical components reconnected, use an OBD2 scanner to clear any stored engine codes.
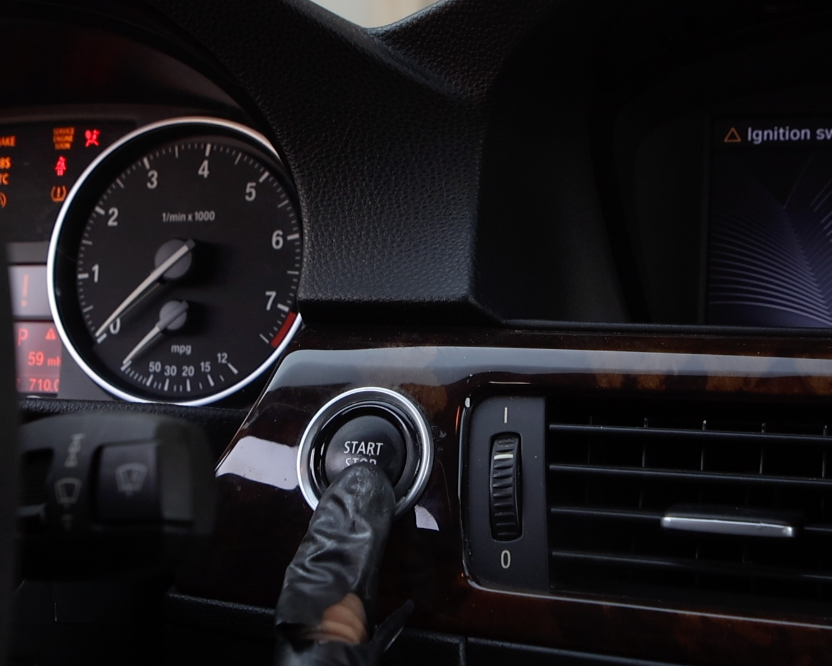
Test Start Engine
With the new gasket installed, the connector secured, and the battery reconnected, start the vehicle to confirm proper engine functionality. The engine may run slightly irregular for a moment as the system recalibrates, but it should smooth out quickly.
Re-Installation
After verifying proper engine operation and ensuring no fault codes are present, reinstall all engine components in the reverse order of removal.

Repair Complete
Good job replacing the eccentric shaft sensor gasket! Keep an eye on the dashboard for any check engine lights, and be sure to inspect the area after operation to confirm no oil leaks are present.