
E9X Headlight Assembly Replacement

Materials Required
- Floor Jack
- Tire Iron
- 8MM Socket
- 10MM Socket
- Ratchet
- T-30 Screwdriver
Overview
This DIY guide will show you how to remove the front bumper using only one floor jack. For this reason, we will be lifting one half of the car at a time. If two floor jacks are owned, or if proper clearance is allowed, lifting the entire front end of the vehicle is recommended.
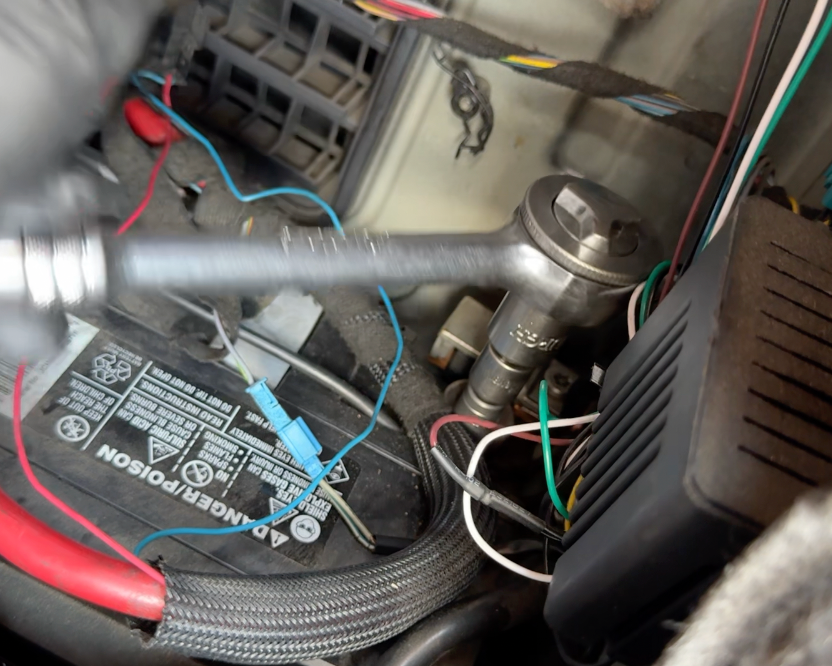
Disconnect Battery
Disconnect the vehicle's battery to ensure safety while conducting this job.
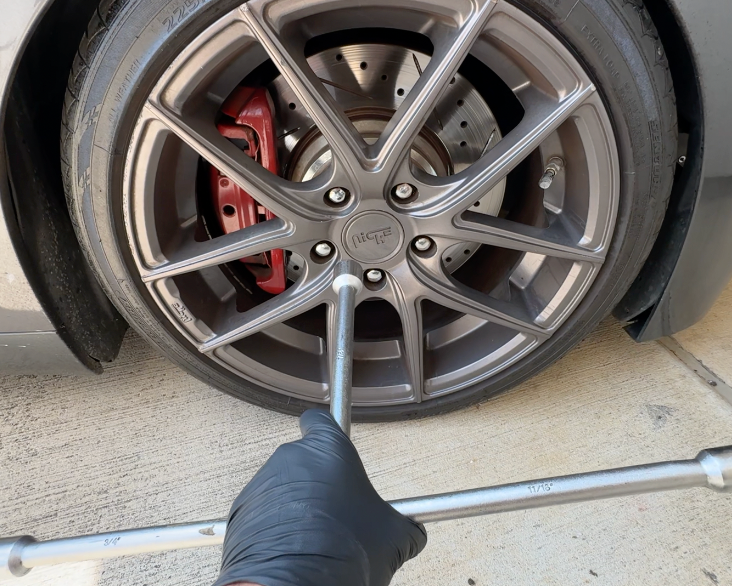
Loosen Lug Nut Torque
Using a tire iron, loosen the torque from the lug nuts, but do not remove them.
Raise Vehicle
Raise vehicle by using a floor jack on the side jack points. Use of jack stands is highly recommended.
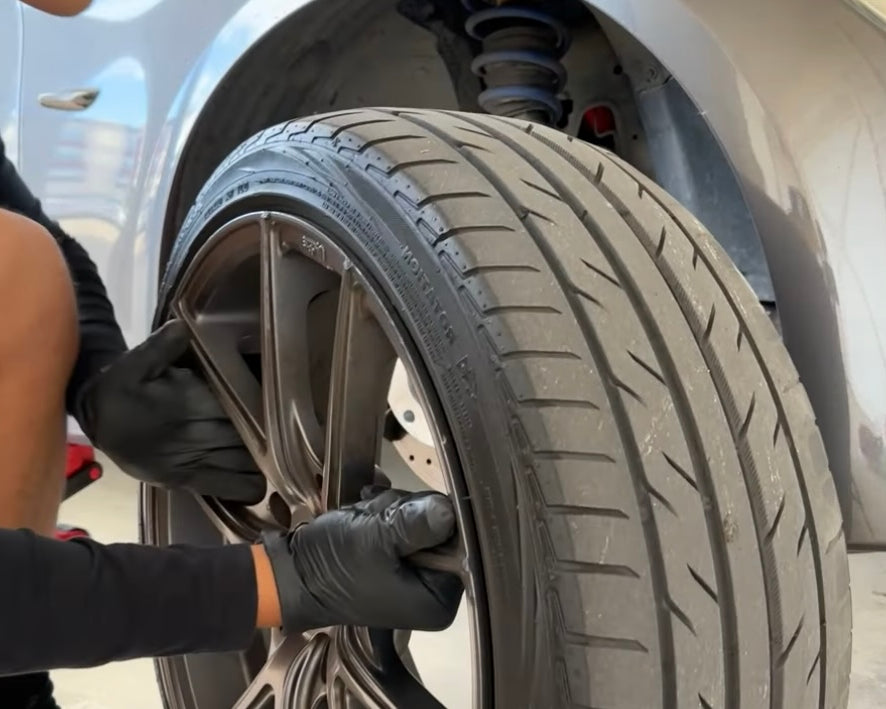
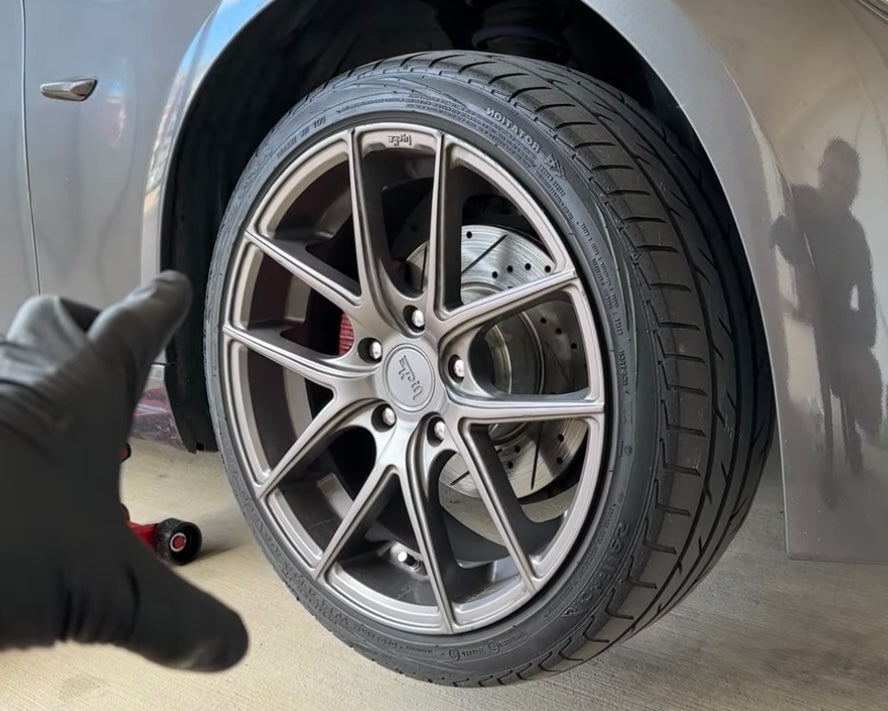
Remove Wheel
Remove the vehicle's wheel being extremely careful not to put any part of your body underneath the car.
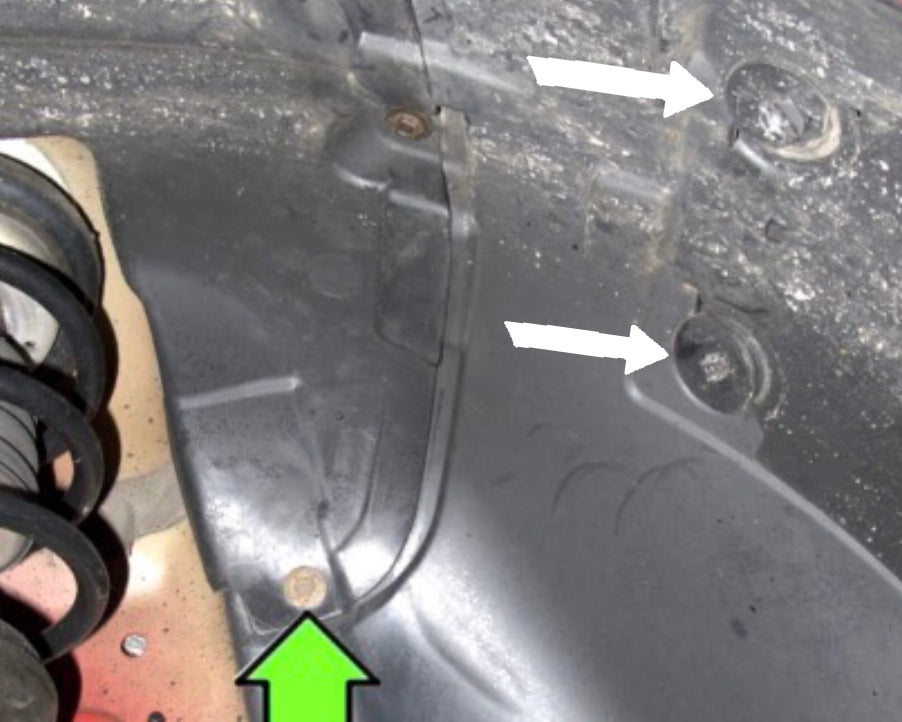
Remove Front Fender Liner Screws
Remove the front fender liner cover that protects the headlight bulbs by loosening the retention screws (white arrows). If your fender liner doesn't have the cover, remove all of the 8MM fender liner screws and the one 10MM nut that holds the liner in place.
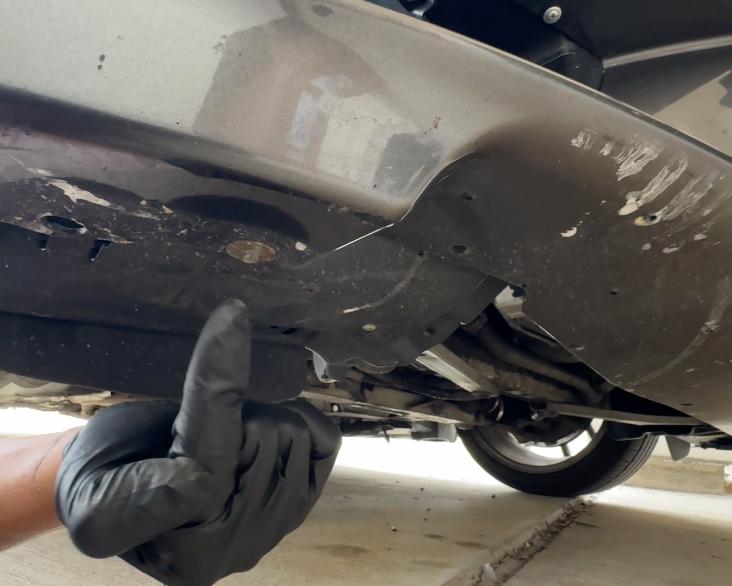
Remove Screws Underneath
Remove any screws holding the fender liner on from underneath the vehicle.
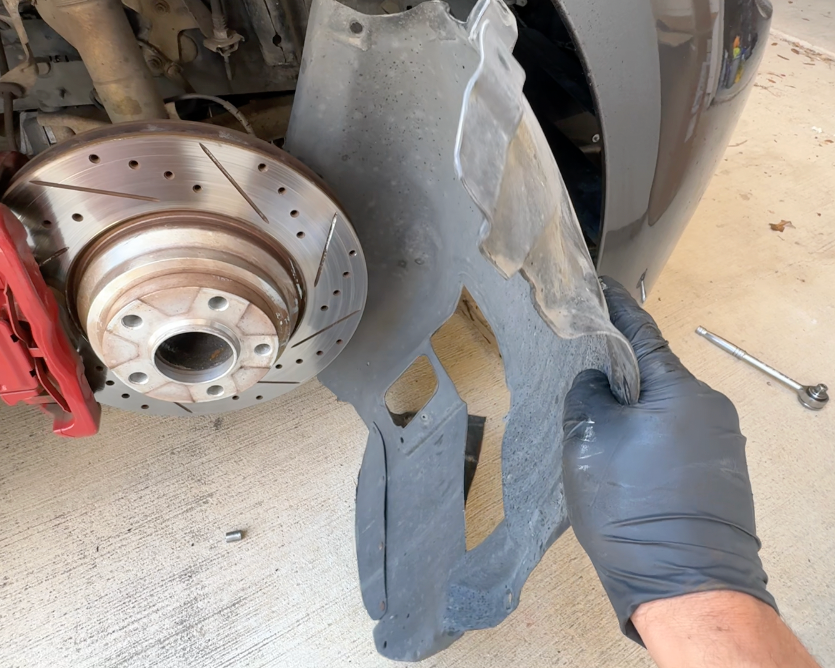
Remove Fender Liner
With all retention screws removed, pull the fender liner from the vehicle.
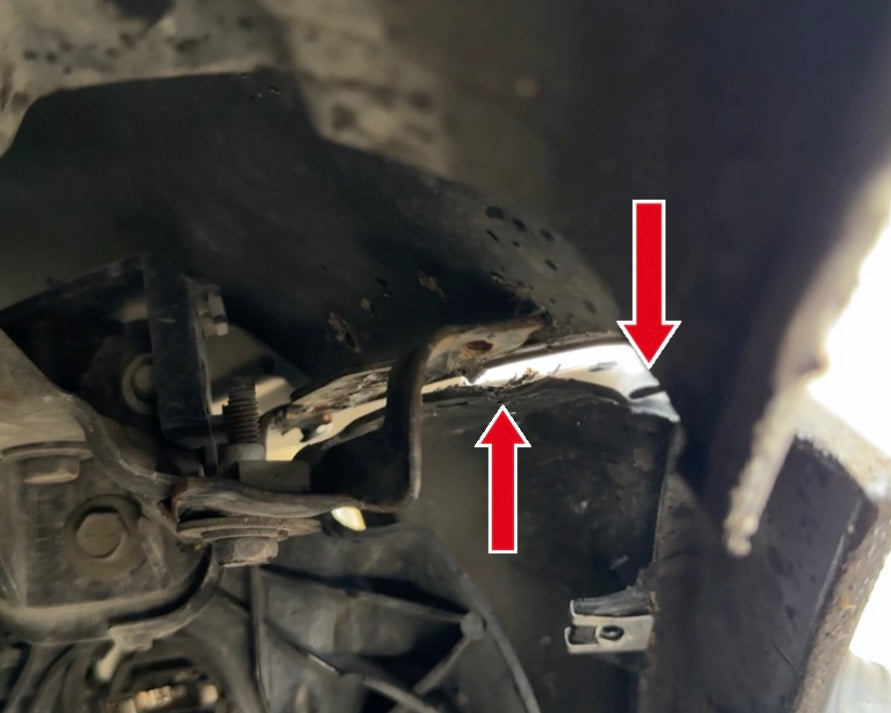
Remove Front Bumper Side Bracket Screws
Remove the two 8MM screws holding the side bracket of the fender to the front bumper.
*NOTE
Since we are using one floor jack, re-install the wheel and repeat the same process on the other side by removing the wheel liner.
Open Hood
Open the hood to the vehicle. The last four screws holding the front bumper on will be in the engine bay.
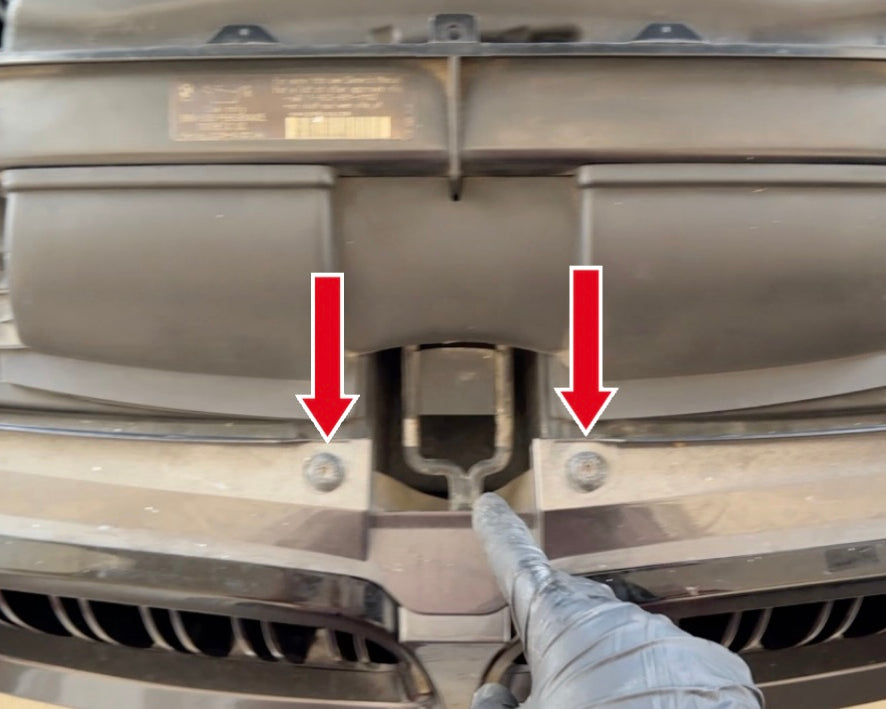
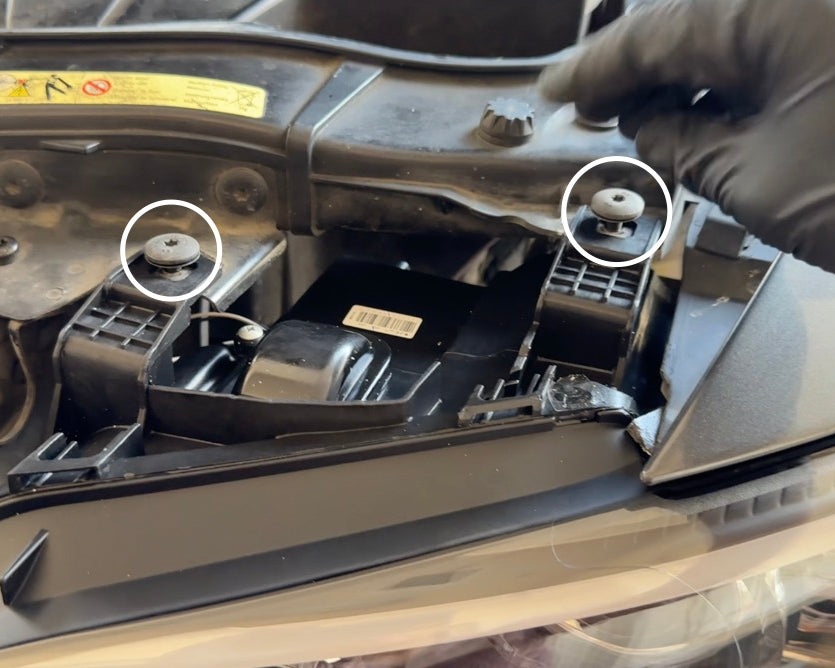
Remove Front Bumper Top Screws
Remove the four T-30 screws holding the front bumper up from the top.
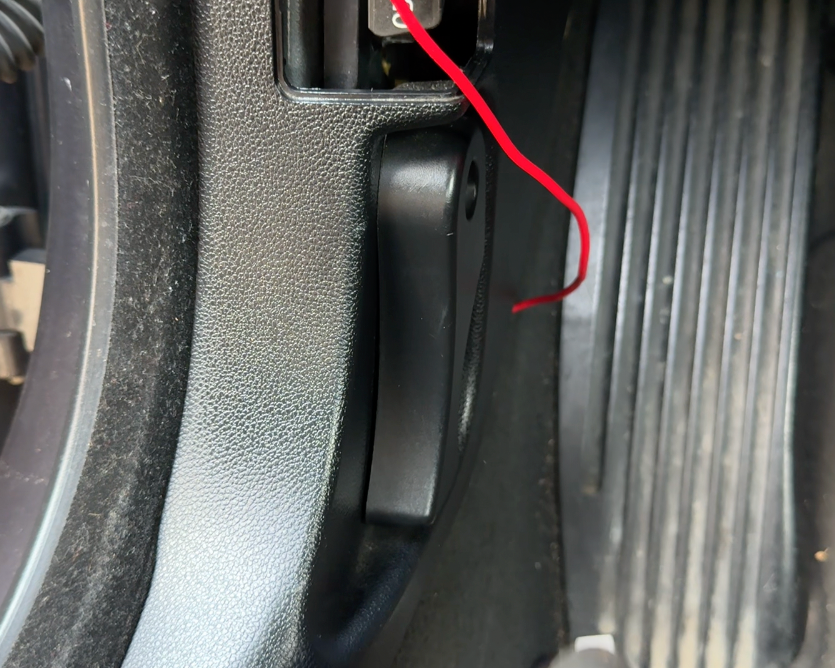
Lift Headlight Washer Cover
If your vehicle is equipped with the headlight washers, use a plastic pry tool to carefully lift the nozzles forward out of place.
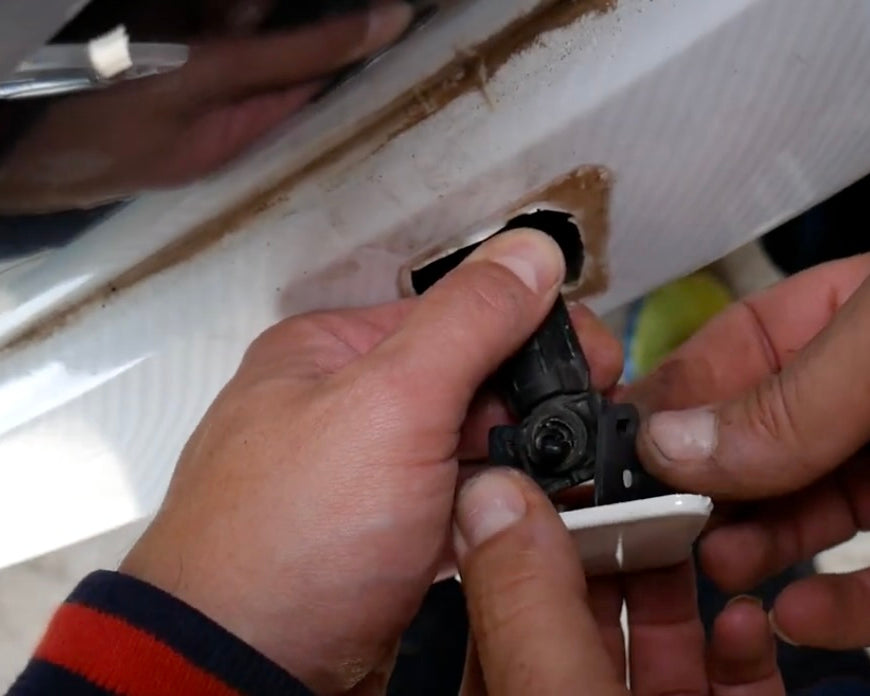
Remove Headlight Washer Cover
With the cover forward, extend the nozzles until the painted cover can carefully be removed from the nozzle body. The washer nozzles can also be disconnected by depressing the middle push connector.
NOTE
If there is a tow hook installed on the vehicle, remove it by simply unscrewing it out of place.
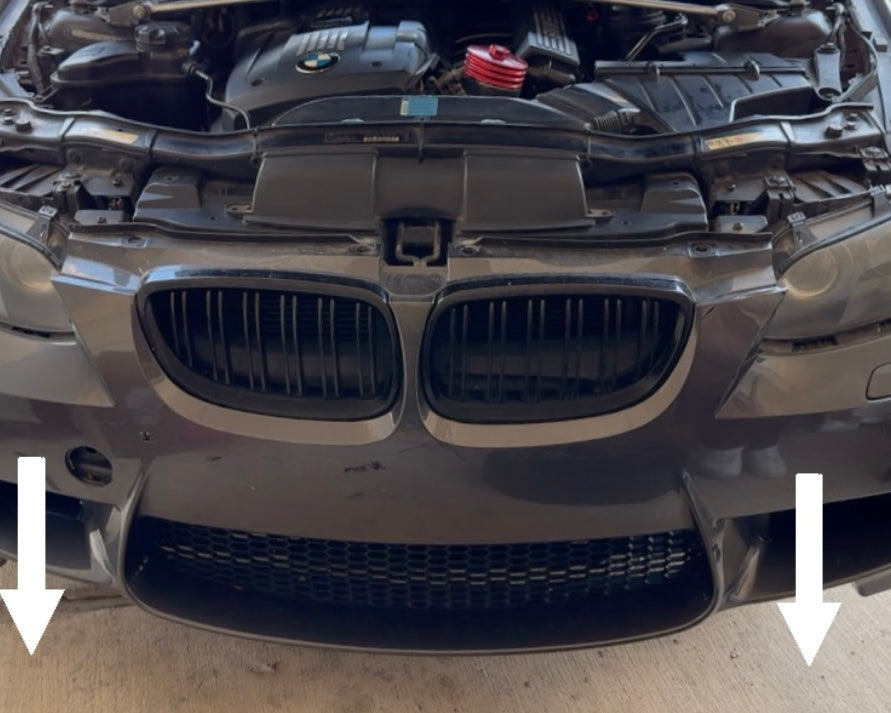
Remove Front Bumper
With all retention screws removed, the front bumper can be carefully pulled forward from the vehicle in the direction of the white arrows shown. Ensure the bottom of the bumper doesn't scrape on the floor. If the bumper does not easily pull from the vehicle, check connecting points to ensure no more screws are holding it in place.

Unplug Headlight Connector
Unplug the main headlight connector by depressing the two push clips on either side.
Remove Top Headlight Screws
Remove the two T-30 screws holding the top of the headlight assembly in place.

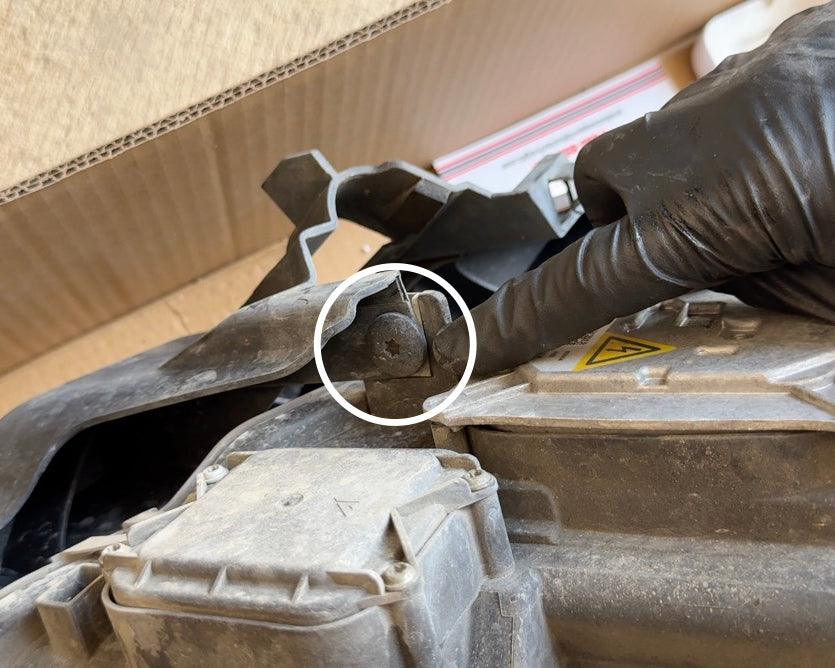
Remove Rear Bolt
Remove the 10MM bolt at the rear of the headlight assembly.

Unclip Fog Light Cables
Unclip the fog light cables from the headlight assembly plastic bracket.

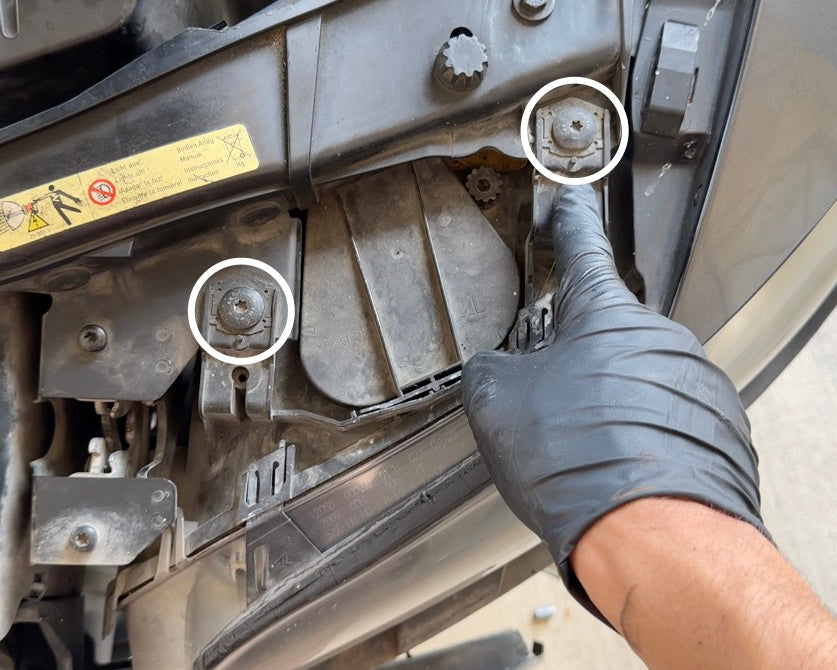
Remove Front Headlight Bolts
Remove the two 10MM bolts holding the headlight assembly into place at the front. An extension is recommended to access these bolts, as the rubber grille intakes may obstruct accessibility.

NOTE
As the last bolt is being removed from the headlight assembly, keep one hand holding it up as the bolt is being loosed to ensure the headlight doesn't fall and become damaged.

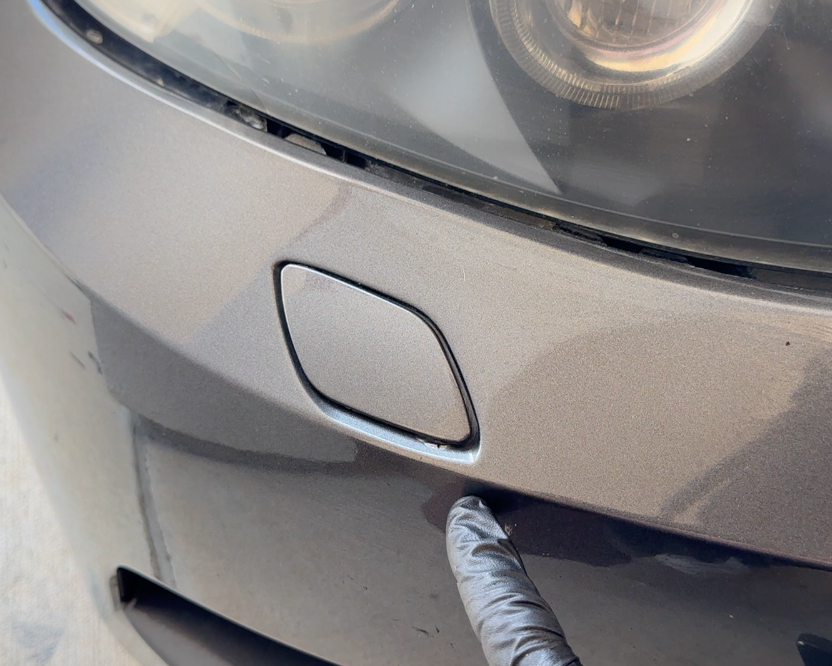
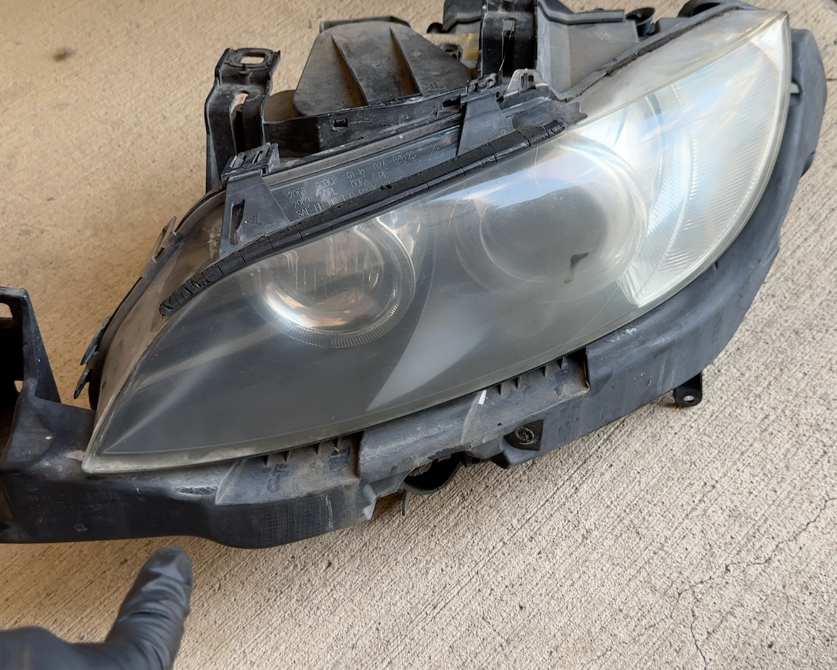
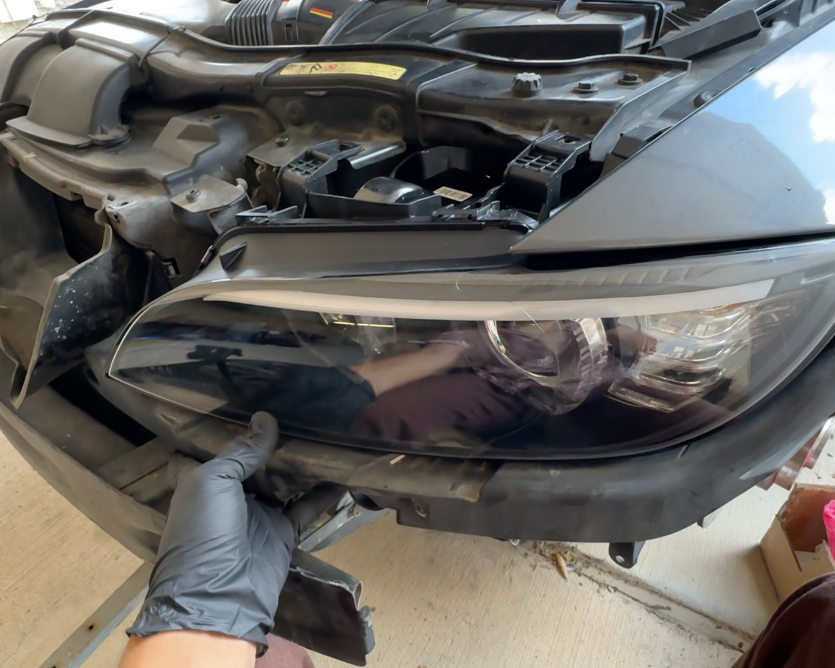
Remove Headlight
With all bolts removed, the headlight assembly can now be removed from the vehicle. Ensure proper care is taken to not scratch or damage the painted fender (red arrow).
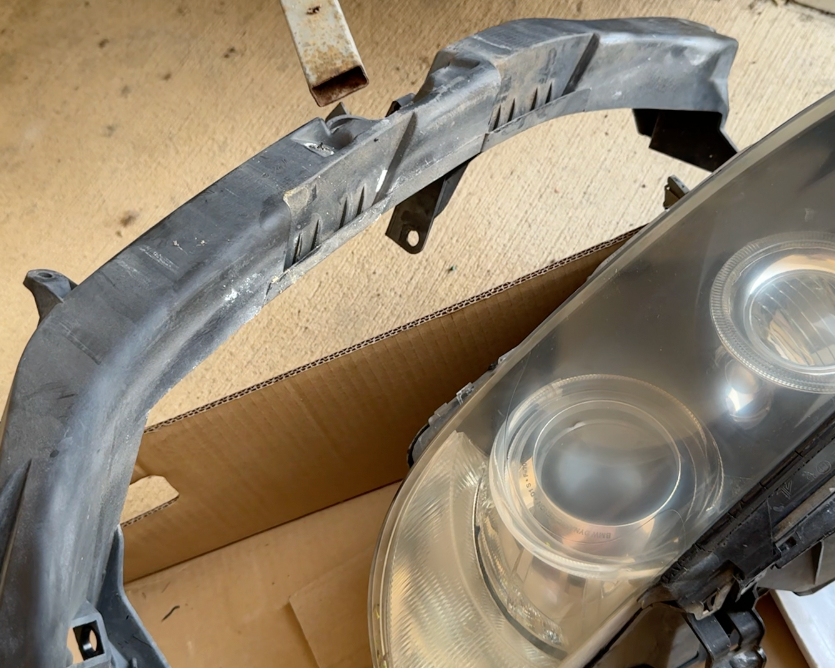
Remove Plastic Headlight Bracket
With the headlight removed from the vehicle, the plastic support bracket can be removed to transfer over to the new headlight assembly.
Remove Bracket Screw 1
Remove the first T-30 screw holding the support bracket to the headlight assembly.

Remove Bracket Screw 2
Remove the second T-30 screw holding the support bracket to the headlight assembly.
Remove Plastic Support Bracket
With both T-30 screws removed, the plastic support bracket can be pulled from the headlight assembly.

Prep New Headlight
The new headlight assembly now needs to be prepped. The electronic headlight control module, ballast, headlight bulb and AFS module (optional) will need to be transferred over to the new assembly.

Plug New Ballast Connectors
Plug in both headlight ballast connectors tight into place, as shown above.

Install Ballast and Screws
Install new headlight ballast, or transfer the old one, to the new headlight assembly using four T-20 screws.

Connect Headlight Control Module
Transfer old headlight control module to the new headlight assembly. Take note the connector is slightly off centered, so do not damage it by forcing it into place. Connector should install smoothly and be pressed down securely afterward.

Install Module Screws
Install the four T-20 retention screws, ensuring they're tightened down fully to not allow water in.
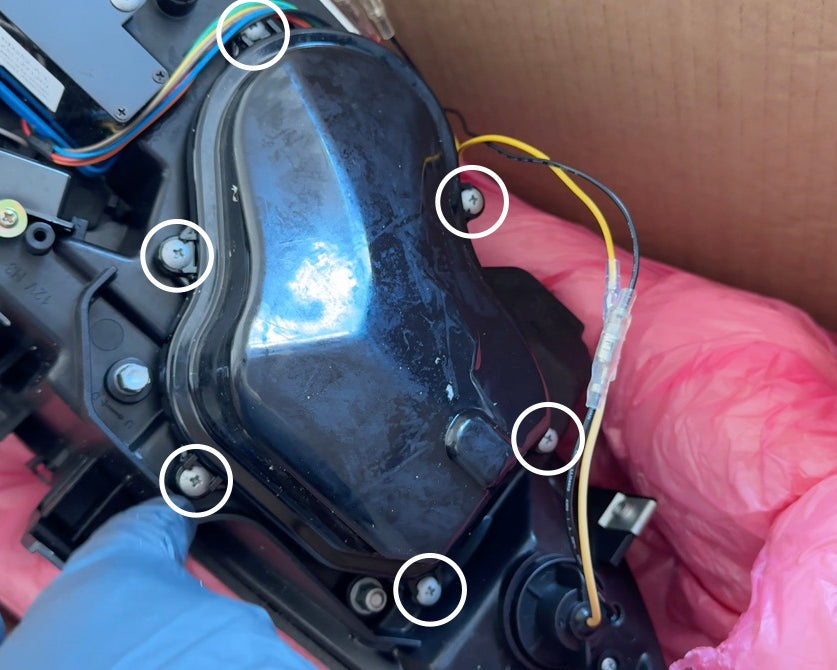
Remove Headlight Bulb Cover
Remove the headlight bulb cover by removing the six phillips screws holding it in place.

Install and Connect Headlight Bulbs
Install headlight bulb into the new headlight assembly. It is highly recommended to install new bulbs, which can be purchased here. Ensure headlight bulb connector is installed afterward.
NOTE
The next step is optional and dependent if the headlights being installed are Adaptive Front-Lighting System (AFS) compatible.

Unplug AFS Connector
Unplug the AFS connector from your old, factory headlight assembly. This will be located underneath the headlight bulb cover.

Loosen AFS Module
Loosen the two T-20 screws holding the AFS module into the headlight assembly

NOTE
The AFS module is held into the headlight internals through a series of connections. To promptly continue this DIY guide, we will skip this process. Further information on AFS removal can be found online.
Re-Install Headlight Bulb Cover
Re-install the headlight bulb cover by tightening the six phillips screws back into place.

Transfer Plastic Support Bracket
With the important components transferred over to the new headlight, the plastic support bracket can now be installed.

NOTE
Installing the plastic bracket over the turn signal bulb/wiring will make replacing it significantly harder in the future. Instead loosen the turn signal and route the bulb/wiring so it goes over the top of the bracket.

Re-install Bracket Screw 1
Re-install the first T-30 bracket retention screw.

Re-Install Bracket Screw 2
Re-install the second bracket retention screw.
Fit New Headlight Assembly
Fit the new headlight assembly into place, ensuring proper care is taken to not scratch the painted fenders.
Re-install Headlight Fasteners
Re-install the top two T-30 screws, the rear 10MM bolt and the two front 10MM tightly into place. For the best fitment, play around with tightening and loosening different ones until optimum fitment is achieved.

Re-Plug Headlight Connector
Connect the headlight connector of the vehicle with the new headlight assembly.
Reconnect Battery
To test the headlight assembly functions properly, reconnect the negative battery terminal.

Test New Headlight
With the battery reconnected, test the new headlight assembly to ensure it functions properly. Check vehicle dashboard for any errors or fault codes. Note that any fault codes may have been from the removal process, so clearing codes with a scanner and re-testing the new headlights may be necessary. Test DRLs, low/high beams and front turn signals to ensure they all work properly.
*Repeat all steps above to remove and replace the other side headlight assembly. Ensure both headlights are fully tested before re-installing the front bumper. Error codes and defects may be temporary and require vehicle engine to be turned on to fully clear.
DIY Complete
Good job replacing you front headlight(s). Re-install everything in the vice versa of removal and keep an eye on the vehicle dashboard for any future error codes, that could point to larger issues.