
Heater Core Coolant Hose Replacement

Materials Required
Tools Required:
- 10MM Wrench
- Flathead Screwdriver
- Pick Tool
New Hose Part No. CHH0812
Start w/ Cold Engine
Ensure you conduct this DIY on a vehicle with a cold engine.

*NOTE
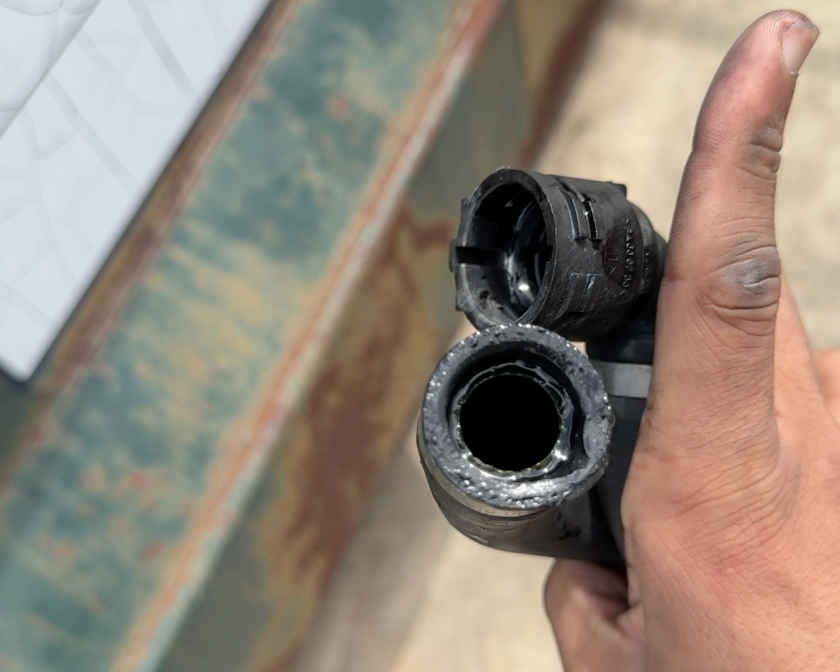
The heater core coolant hose typically tears off at the connection point to the upper radiator hose. This is the most common way it'll fail. A very temporary band aid can be using a zip-tie to refit it back on.

Remove Air Box Screws
Remove the two 10MM air box screws using a ratchet.
Unplug MAF
Unplug the mass airflow sensor by using a flathead screwdriver to lift up on the retention tab and pulling the harness back.

Loosen Band Clamp 1
Loosen the band clamp that holds the air intake hose to the air box, with a flathead screwdriver.
Loosen Band Clamp 2
Loosen the band clamp that holds the air intake hose to the throttle body, with a flathead screwdriver.

Remove Air Intake Hose
Remove the air intake hose from your engine bay.

Remove Air Box
With everything loosened, the air box can now be removed from the engine bay.

Remove Cabin Air Filter Cowl Screws
Remove the cabin air filter cowl screws using an 8MM socket/ratchet.

Remove Both Cowl Covers
Remove the ECU and brake master cylinder cowl covers by simply lifting up on the retention clip located on either side and simply remove them from the engine bay.

Remove Cowl Connector 1
Remove the first cowl connector by pressing down on the retention clip and pulling the connector off of the sensor.

Remove Cowl Connector 2
Remove the second cowl connector by pressing down on the retention clip and pulling the connector off of the sensor.

Remove Cowl from Engine Bay
The cabin air filter cowl can now be removed from the engine bay.

Unlock Retention Clip
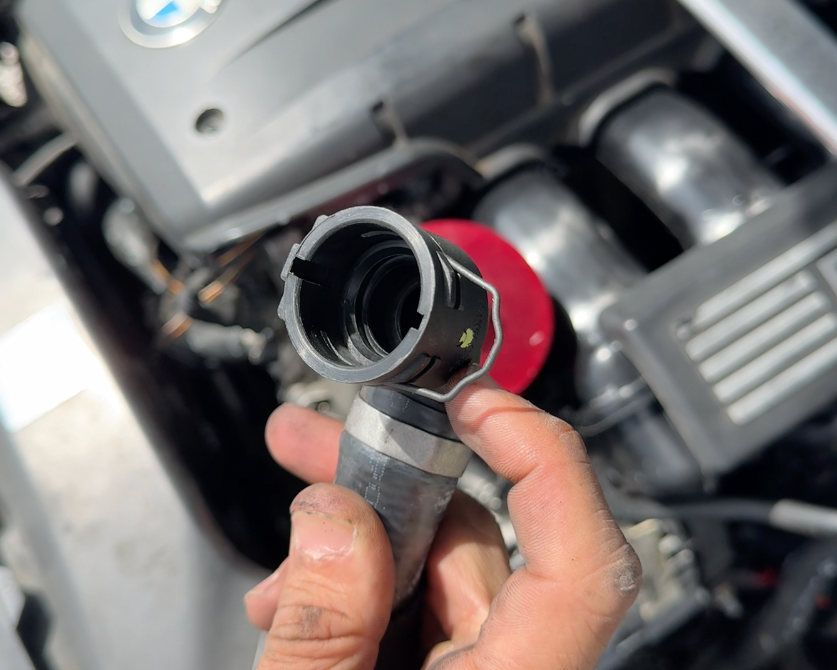
Unlock the retention clip that holds the heater hose to the upper radiator hose.

Remove Hose From Radiator Hose
Remove the heater hose from the upper radiator hose by gently but firmly pulling it back and forth, until it comes off.

Unclip Hose from Chassis
Unclip the coolant hose from the chassis of the vehicle.

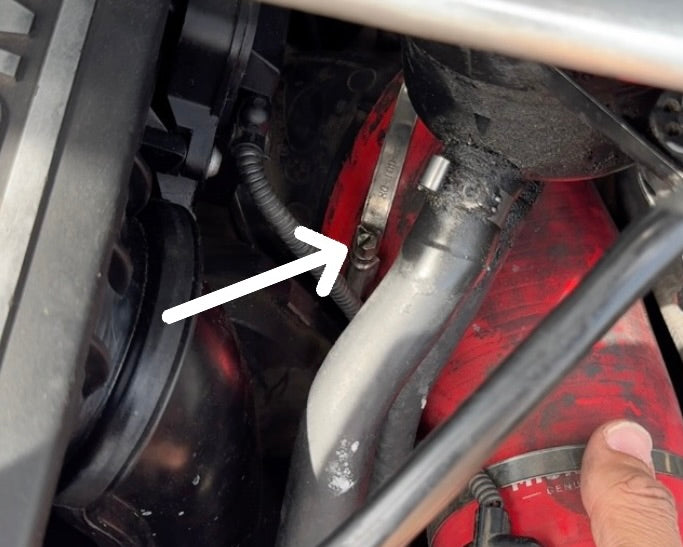
*NOTE
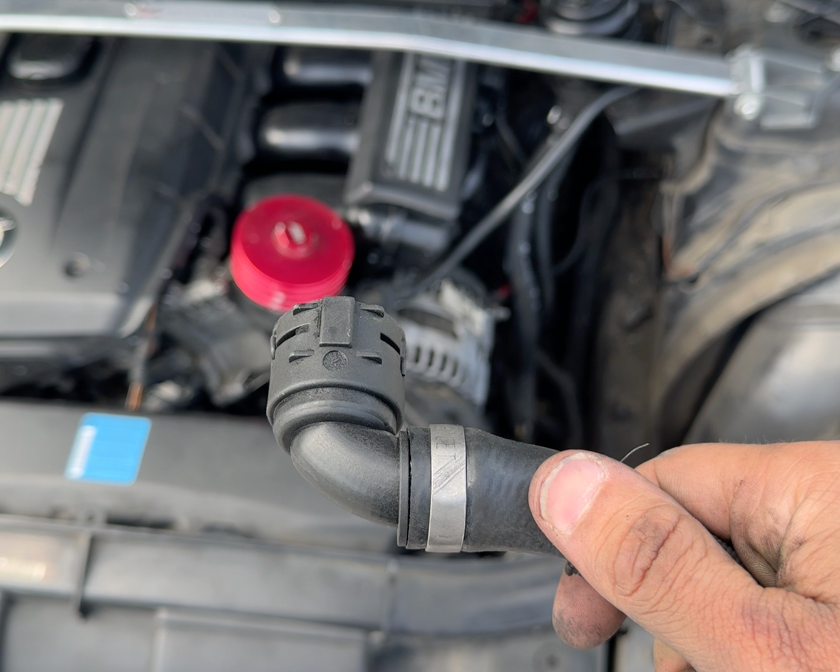
There are two coolant hoses routed to the heater core. The hose we are replacing is the one to the right (white arrow), not left.

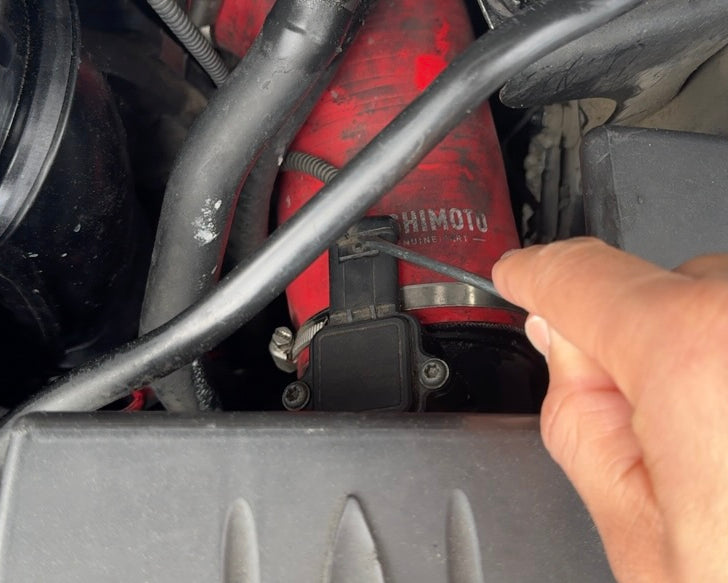
*URGENT NOTE
The hose being replaced is not the top hose with the silver clamp (red arrow). The hose we are replacing is directly underneath (white arrow).

Unlock Hose Retention Clip
Unlock the hose retention clip by using a flathead screwdriver to push the retention clip (white circle) down as much as possible. Do not be scared of losing this clip as the new hose has one pre-installed.

Remove Hose from Heater Core
Remove the hose from the heater core by grabbing as close as possible to the connecting point and firmly pull while wiggling back and forth.

Remove Hose from Heater Core
Remove the hose from the heater core by grabbing as close as possible to the connecting point and firmly pull while wiggling back and forth.
Discard Old Hose
After removing the old coolant hose, discard it properly.
Prepare New Coolant Hose
To make install of the new hose easier, pull the retention clip to the unlocked position so you can simply slide it into place, in the engine bay.
*NOTE
Ensure you are orienting the new coolant hose's connecting point the same way as the picture above. Orienting the hose connecting point the wrong way can cause damage to the heater core and lengthen the install process.

Connect Hose to Heater Hore
Connect the new coolant hose to the heater core by firmly pushing it into place and locking the retention clip in place.

*NOTE
After locking the retention clip down, carefully but firmly grab the hose and pull on it to ensure it doesn't come free. If it comes free, re-install properly. If is doesn't, proceed with the tutorial.

Install New Hose to Upper Radiator Hose
Firmly press the new hose into place on the upper radiator hose. Be sure to align the grooves on the hose and nipple properly.

Lock Retention Clip
After pressing the new hose into place, lock the retention clip down.
Secure Hose to Chassis
Secure the new hose to the chassis of the vehicle by clipping it into place.
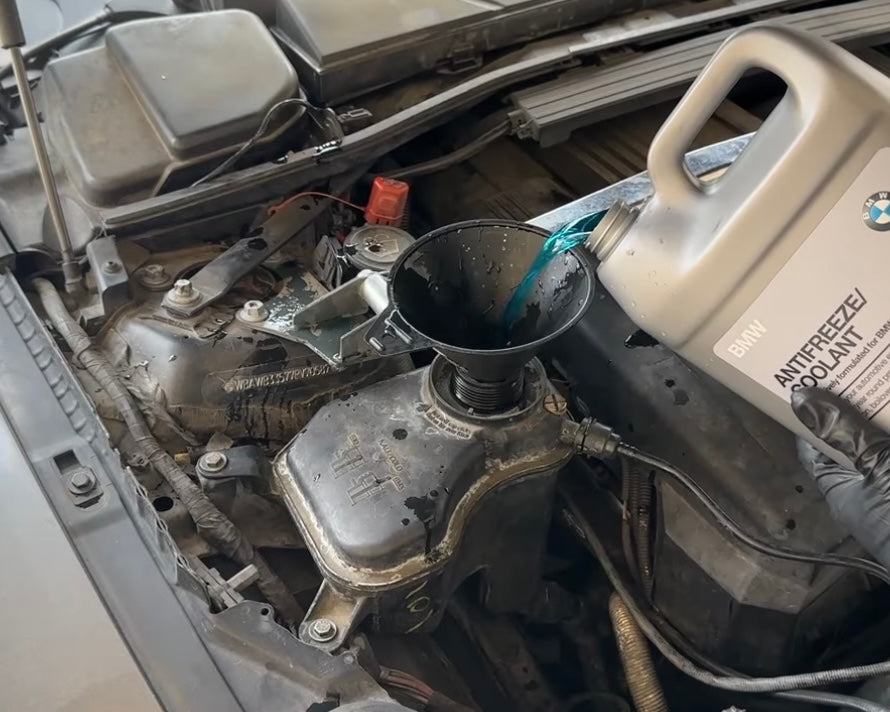
Fill and Bleed Cooling System
Fill your cooling system with approved BMW coolant until full, then carry out cooling system bleed procedure.
DIY Complete!
Good job replacing your expansion tank coolant recirculation hose! Be sure to keep an eye on your cooling system in the days after to ensure no other coolant leraks are present.