Radiator Replacement Guide
-

Remove Radiator Cap
Twist counter-clockwise to remove vehicle's expansion tank cap.
-

Remove Bleed Screw
Twist counter-clockwise with a [larger] flathead screwdriver.
-

Allow Coolant to Drain
Allow vehicle's cooling system to drain until no more coolant flows out.
-

Remove Air Snorkel
Remove the front and back air intake snorkels by removing the 2 T-15 screws (white arrows).
-

Remove Fan Connector
Depress the 2 side clips holding the fan shroud electrical connector into place.
-

Remove Intake Screws
Remove the 2 10MM bolts securing the air intake box into place.
-

Remove Air Intake Hose
Remove MAF connector by using a flathead to lift up the retention clip. Then, remove the silver band clamp using a flathead.
-

Remove Air Intake Box
After loosening the silver band clamp, wiggle the air intake box out of place and put it off to the side.
-

Remove Hose Clamp
Remove coolant recirculation hose band clamp using a flathead screwdriver.
-

Remove Oil Cooler Screw
Unseat the vehicle's transmission/oil cooler from the fan assembly by removing the T-20 retention screw.
-
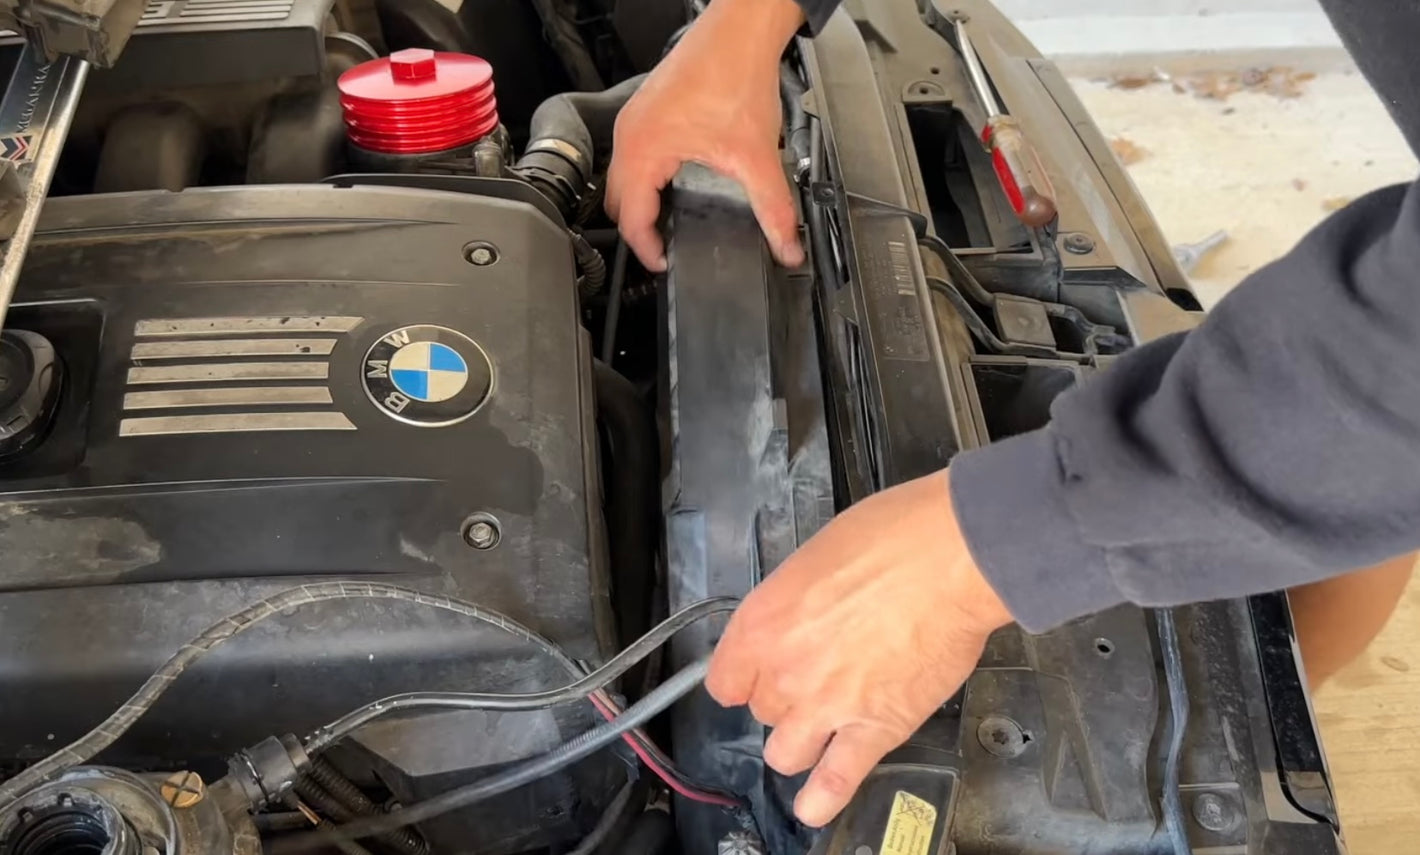
Remove Fan Assembly
Carefully remove the vehicle's radiator by pulling up, while clearing all electrical and coolant lines out of the way.
-

Loosen Upper Hose
Release the upper radiator hose by fully pulling up on all 3 retention clips shown.
-

Remove Upper Hose
After all retention clips are loosened, pull carefully but forcefully to detach and remove the upper radiator hose.
-

Remove Lower Hose 1
Remove lower radiator hose by releasing the retention clip, then pull until hose is released from the radiator.
-

Remove Lower Hose 2
Remove secondary lower radiator hose by releasing the retention clip, then pull until hose is released from the radiator. (hook pick tool recommended)
-

Remove Oil Cooler Screw
Remove the oil cooler hose attached to the lower radiator, by removing the T-20/25 screw and backing the hose off.
-

Remove Radiator Screws
Remove the 2 T-20/25 screws that are mounting the radiator into place.
-

Remove Radiator
Remove the radiator by carefully pulling up, while clearing all electrical and coolant lines out of the way.
-

Transfer Hardware to New Radiator
Transfer all applicable hardware to the new radiator (unless not needed). i.e. clips, hoses, screws, etc.
-

Install New Radiator
Install new radiator in the exact reversal of the removal. (After removing any coolant hose, replacement is recommended and o-ring replacement is required.)
-

Fill and Bleed Cooling System
BMW Cooling System Bleed ProcedureFill your cooling system with approved BMW coolant until full, then carry out cooling system bleed procedure.
-
DIY Complete!
Good job replacing your radiator! Be sure to keep an eye out for coolant leaks or any signs of overheating.


